


Clients
Clients management
Clients are a group of users that can only access the client area in EasyDCIM. Every client can manage their own services such as dedicated servers and collocations. Clients do not have access to EasyDCIM’s admin area or API.
Adding client account
A client account can be manually added from the backend. To do so, you need to select the “Clients” tab from the side menu and select “Add Client” from the top action menu. The form includes the following fields:
- Firstname - name of the client.
- Lastname - surname of the client.
- Company Name - the name of the client’s company.
- Date Of Birth - client’s date of birth.
- Email Address - a unique email address used by the client to log in into the client area.
- Username - unique username of the client.
- Password - the password used by the client to log in into the client area.
Moreover, you can define information regarding the client’s postal address and location in the Address Information and Localization tabs.
The account is created as “inactive” until the client starts using it. An email with an activation link will be sent to the client. This is the default behavior of the system, but it can be changed in the advanced system settings.
Deleting client account
Client accounts in EasyDCIM can be deleted as long as they do not have any active orders or services attached. Before deleting an account from the system, you need to close all orders made by the client. Only then will you be able to delete their account along with the closed orders.
Merging client accounts
In case there is a need to merge two client accounts into one, you can do that with the Merge Client option that you can find in the Actions menu on the client summary view.
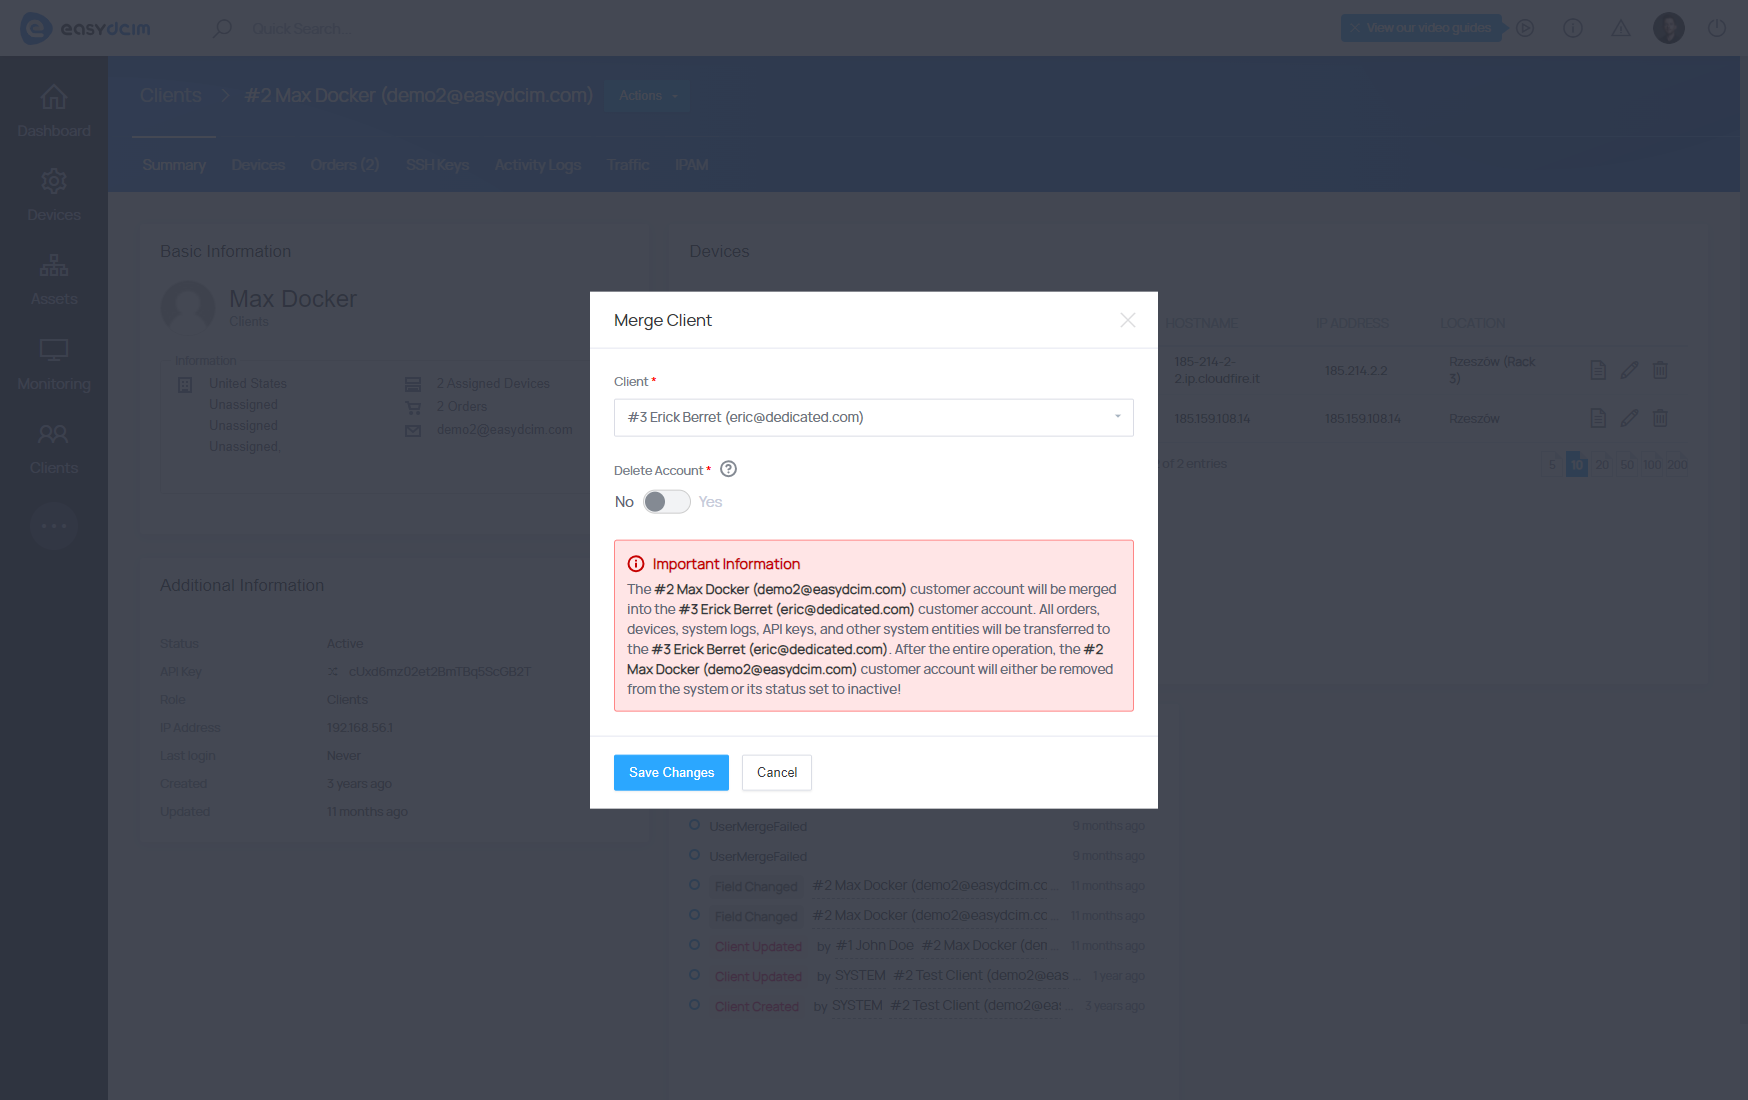
Here is a comprehensive description of the process:
- Log into the system and navigate to the desired client account.
- Click on the action menu and select “Merge Client”.
- In the modal that appears, choose the client to which all data (including orders, devices, system logs, API keys, and other system entities) will be transferred.
- If you want to delete the original client account after the merge, check the “Delete Account” option. If unchecked, the original account will remain, but its data will be transferred.
- After configuring the options in the modal, click “Save Changes.” You will be redirected to the destination client account with the merged data.
Login as client
Administrators that have been granted rights to manage clients will be able to log into client accounts. It is a useful function that allows the admin to verify how each service looks and functions from the perspective of the client.
To log in as a client from the backend, navigate to the client summary view and choose “Login As Client” from the Actions menu. You will be automatically logged in to the client’s profile in a separate browser tab.
SSH Keys management
Every client can manage their own SSH keys that are used during the operating system installation process.
This has been described in detail in the OS Installation section.
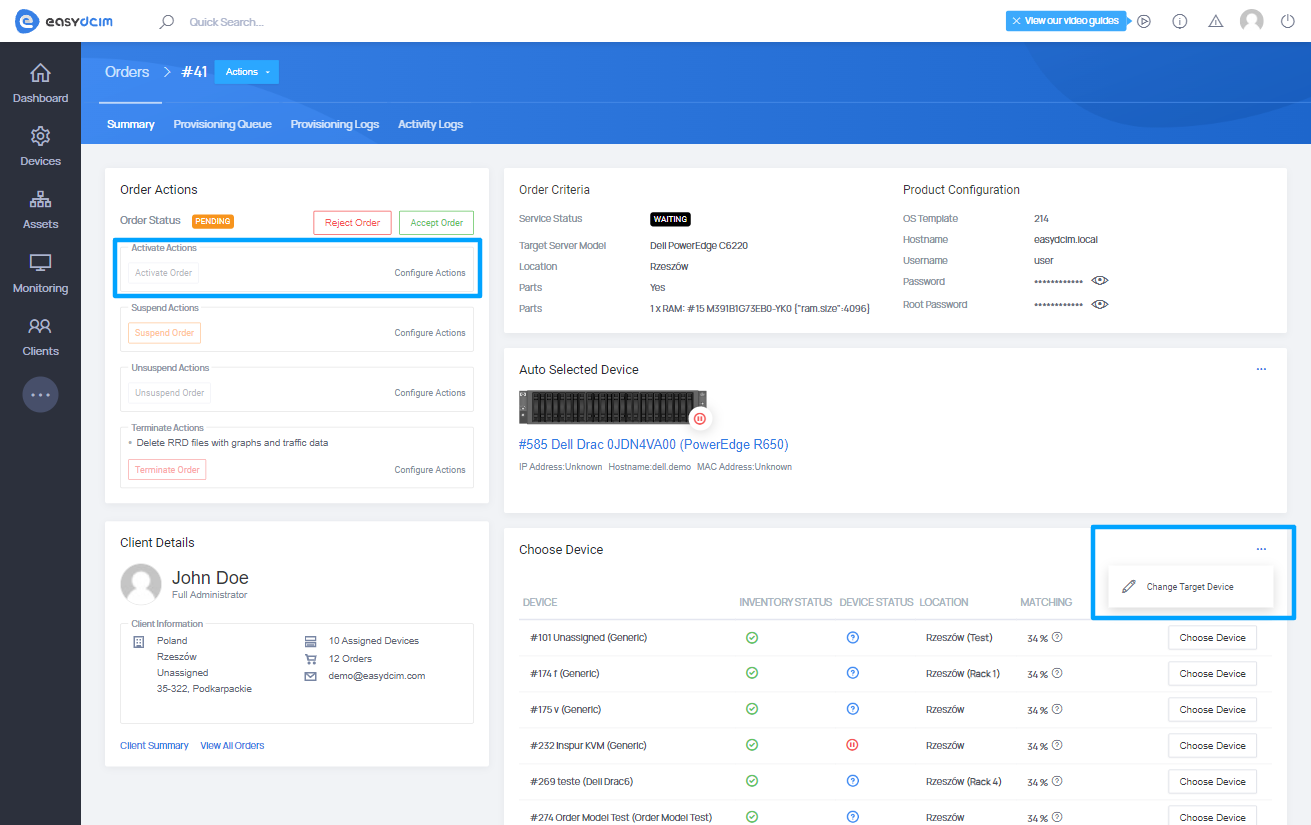
Assigning servers to clients
Dedicated servers can be allocated to clients to allow their easy management either directly through the EasyDCIM platform or via an external billing system. To enable an end client to manage a dedicated server, a corresponding order must be created first. The entire ordering process is described in detail in the “Creating New Order” section.
When creating an order, you need to:
- Select a client to manage the dedicated server.
- Select the appropriate server using the option: “Change Target Device” in the order summary view.
- Accept the order and activate the service.
When activating the service, the system can perform a number of additional actions. If you do not want to perform any additional actions on the dedicated server, you have to remove all the default actions. It can be done in the order summary view → “Activate Actions” box located on the left side.
Once all the preceding steps are complete, the end client will be able to remotely manage the server by performing various actions, including:
- Reinstalling the operating system,
- Executing the boot/reboot/shutdown actions,
- Accessing KVM console in a noVNC session,
- Monitoring the outgoing and incoming transfer usage.

