Creating New Order
Start creating a new order by choosing from left menu respectively Clients → Orders → Add Order.
You will be redirected to the order form which is divided into several steps. They will be described in the below sections.
Step 1: Adding a New Order
As an administrator, use the Add Order form to quickly assign a server or device to a client:
- Service Type – Select the type of service (e.g., Server).
- Client – Choose the client for whom the order is created.
- Device – Select an available device. Only devices marked as Available and not previously assigned can be selected. This ensures proper resource tracking and client assignment.
After clicking Create & Activate Order, the order will be created and automatically activated. No activation actions (e.g., provisioning or OS installation) will be performed automatically at this stage.
Advanced order configuration, including setting service criteria, is only possible via the API or during the order editing process. The quick order form available in the backend section is designed for fast assignment of a target device to a client.
Step 2: Service Criteria
Important: Service criteria can only be edited if the order status is Pending. Once the order is activated or completed, this step becomes locked.
Based on the defined criteria, the system will automatically search for the most suitable server that matches the specified requirements.
- Target Server Model – Select the desired server model (e.g., Dell R200).
- Location – Choose the physical location for server placement.
- Parts – Optionally define required components (e.g., RAM, HDD). Depending on the part types selected (e.g., RAM, CPU), the form dynamically displays relevant fields. These filters allow precise control over hardware provisioning and ensure compatibility with the client’s requirements.
- Metadata – Add required metadata (e.g., Firmware, Custom Metadata).
- PDU Connection Verification – Set to Yes if the server must connect to a PDU.
- Switch Connection Verification – Set to Yes if the server must connect to a switch.
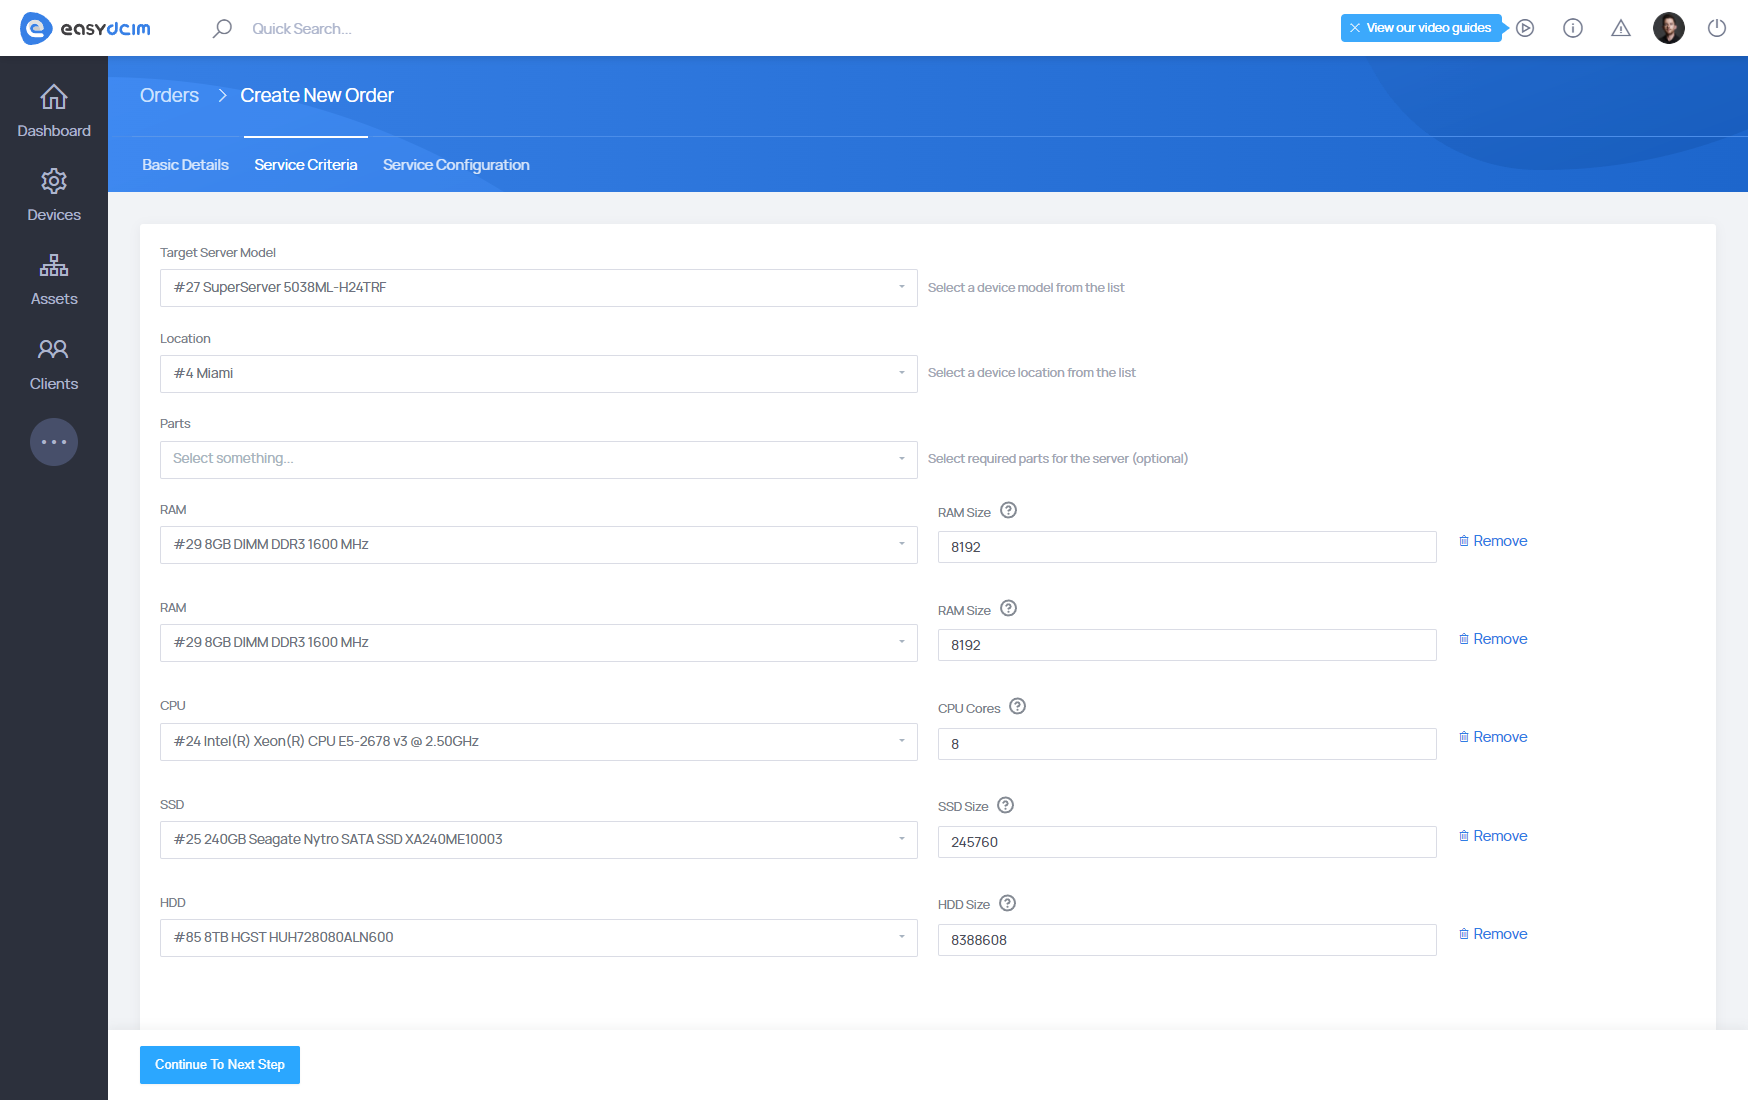
Click Continue To Next Step to proceed. For more advanced filtering with hardware types, refer to: Items, Types and Models.
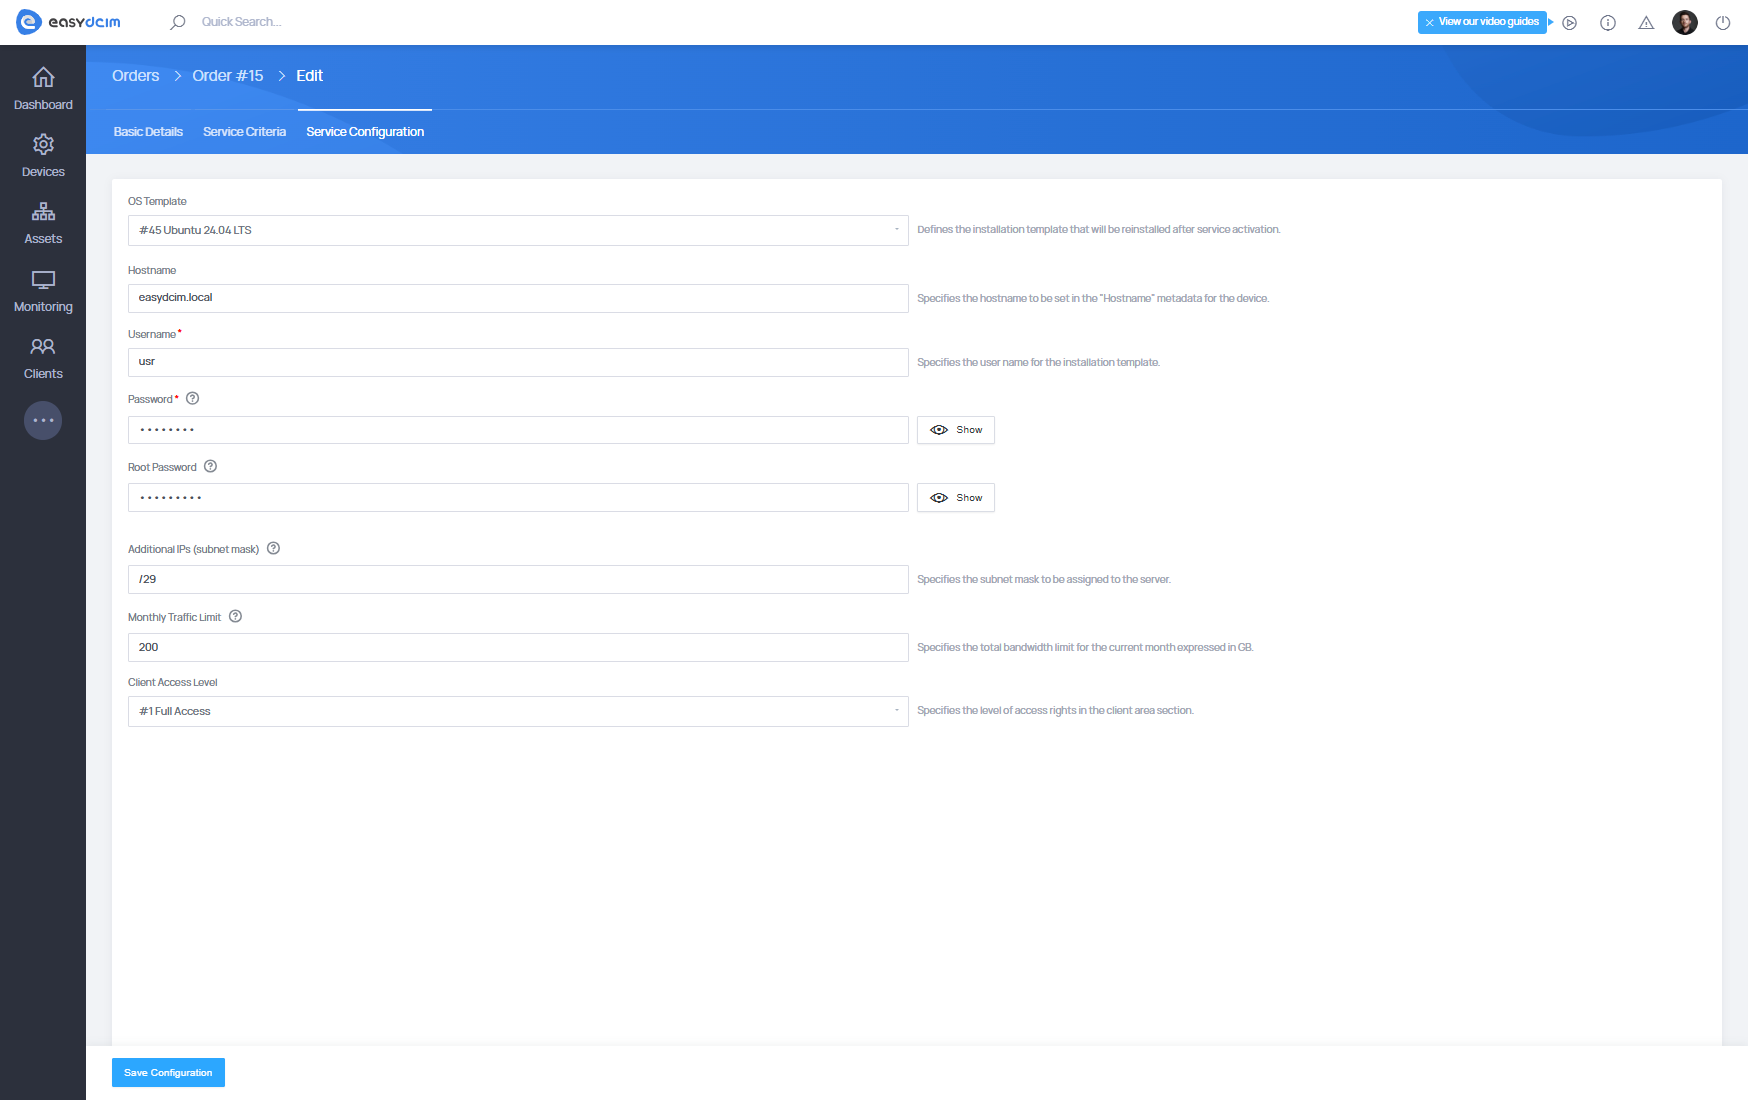
Step 3: Service Configuration
Important: Service configuration can only be edited if the order status is Pending. Once the order is activated or completed, this step becomes locked.
In the final step of order preparation, you define how the service will be configured once it’s activated.
This configuration determines what will be installed, how the server will be accessed, and what restrictions will apply. It is especially important if the server is being provisioned automatically after activation.
- OS Template – Select an operating system installation template (optional). The selected OS will be reinstalled after service activation.
- Hostname – The hostname that will be applied to the server (e.g.,
easydcim.local). - Username – The user account that will be set up during OS installation.
- Password – The password for the above user.
- Root Password – Root account password.
- Additional IPs (subnet mask) – Define additional IPs in CIDR format (e.g.,
/29). - Monthly Traffic Limit – Set the bandwidth cap for the server in GB.
- Client Access Level – Define how much access the client will have in the client portal (e.g., full access, limited access).
After clicking the Save Configuration button, you will be redirected to the placed order summary page.