Accepting Order
After the order is successfully placed, you will be redirected to the order summary view page. The page contains the following sections:
- Order Criteria
- Auto Detected Device
- Choose Device
- Order Actions
Auto Selected Device
It is a box containing information about the best fitting server based on criteria selected by the client placing the order.
You can read more about fitting servers in the section Provisioning Flow. The server which was fitted by the system can be freely changed, Change Target Device button should be used to do that.
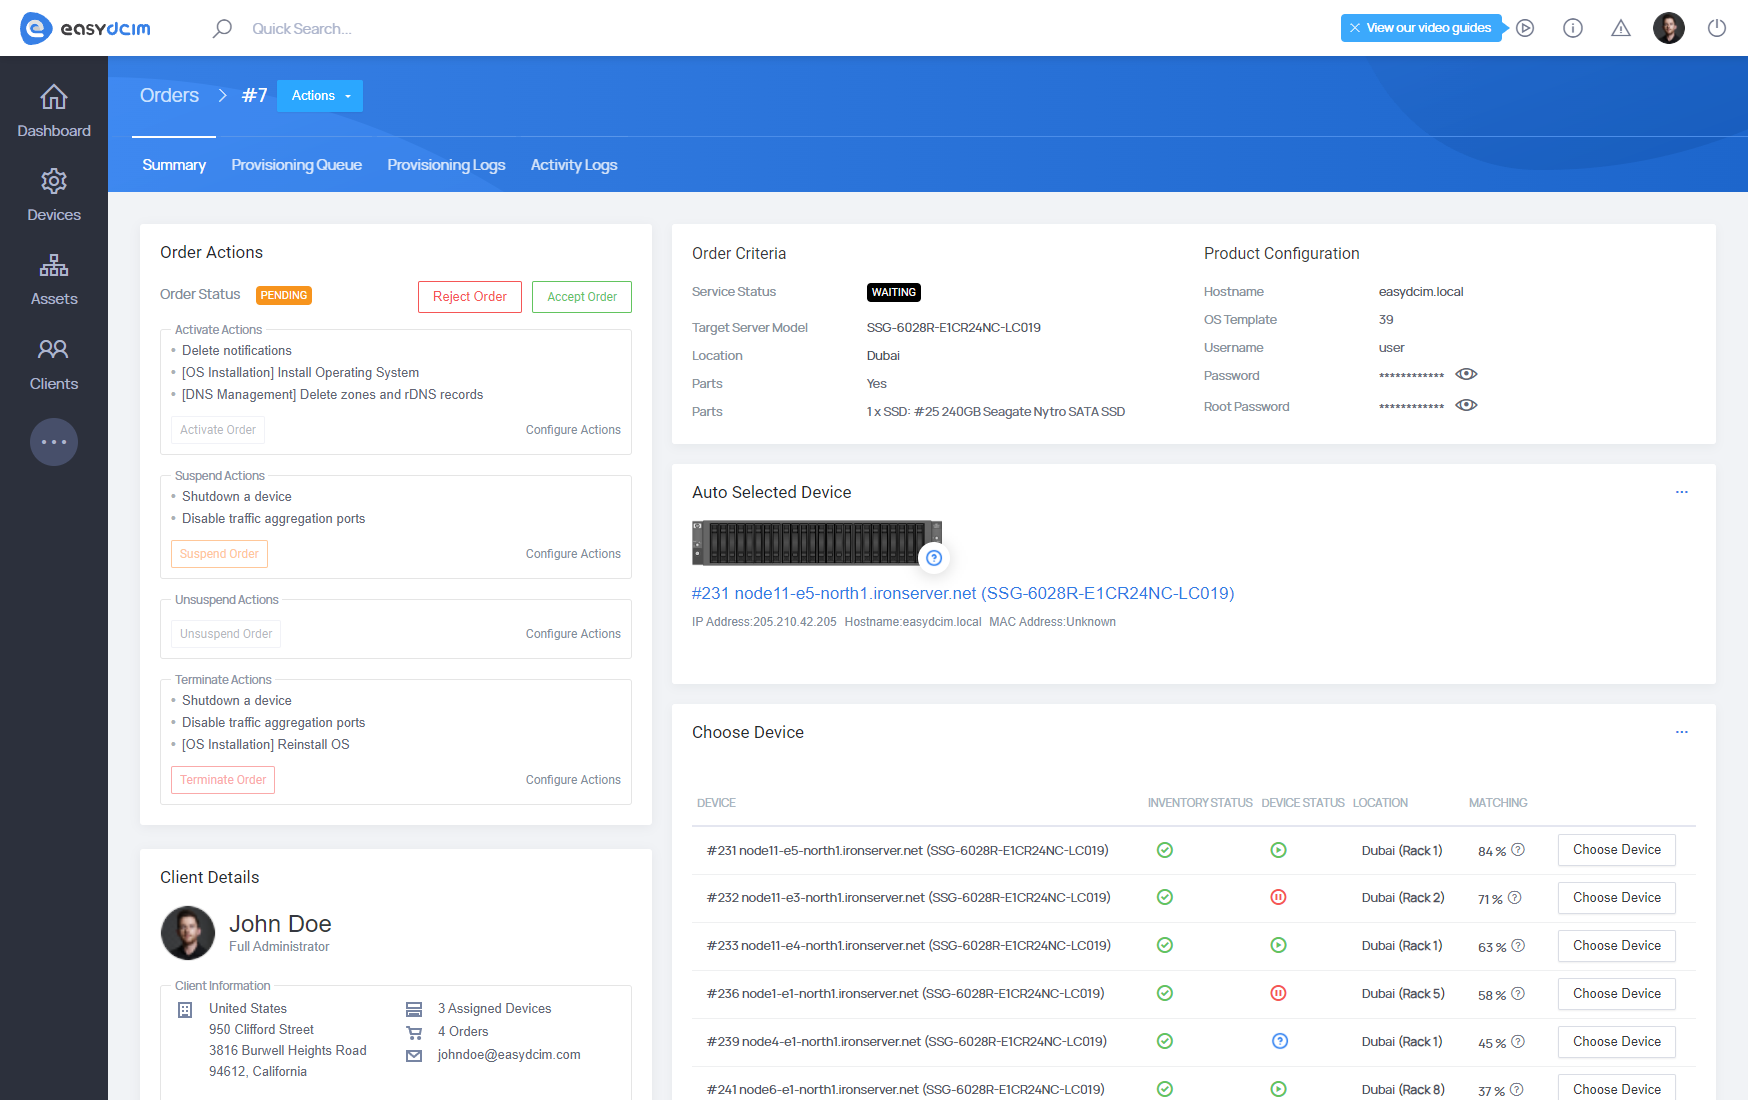
Order Criteria
Order criteria box contains details specified by the client. To edit client’s choice you have to select from the upper menu Edit Order action button and then fill out the fields.
Order Actions
To accept the order, click the Actions button in the top menu and select Accept Order. This will display an information box with order details.
Once you confirm by pressing Accept Order, the system will automatically perform the following actions:
- The status of the selected server will be updated to In Use
- The hostname provided by the client will be assigned to the server
- The client who placed the order will be linked to the server
EasyDCIM allows you to define specific actions to be executed automatically when an order is activated, suspended, unsuspended, or terminated. These actions can be configured globally for all orders (Servers and Colocations) via the Advanced System Configuration section: Set Up Orders and Service Provisioning.
While this configuration applies globally by default, you can override it on a per-order basis. To do so, navigate to the Order Summary view: Assigning Servers to Clients.
Additionally, if you’re using the WHMCS integration, you can customize these actions globally for each product within the module settings.
In summary, you have three levels at which to configure automation behavior:
- Globally in EasyDCIM (applies to all orders)
- Per individual order in EasyDCIM
- Per product in WHMCS
Provisioning Actions Overview
The following table lists and explains the available provisioning actions in EasyDCIM. These actions can be configured to run during specific order events: Activate, Suspend, Unsuspend, and Terminate. Depending on the event type, the same action may perform a different role (e.g., install OS on activation or wipe disk on termination).
DNS Management
| Action name | Description |
|---|---|
| [DNS management] Create RDNS records | Generates PTR (reverse DNS) records for assigned IPs, essential for email deliverability and IP trust. |
| [DNS management] Create zone | Creates a new DNS zone for the assigned device. |
| [DNS management] Delete zones and RDNS records | Cleans up DNS and reverse DNS records. |
General Operations
| Action name | Description |
|---|---|
| Boot a device | Sends a power-on signal to the physical server (e.g., via IPMI or similar). |
| Shutdown a device | Sends a shutdown command to turn off the physical server. |
| Change inventory status | Updates the inventory status of the device (e.g., to “available”). |
| Unassign device parts | Removes hardware components (e.g., disks) from the server record. |
| Clear additional IP addresses value | Deletes any extra IPs linked to the service. |
| Clear hostname & SSH values | Clears hostname and SSH credentials associated with the server. |
| Delete notifications | Removes all notifications linked to the service. |
| Delete RRD files with graphs and traffic data | Deletes traffic history and performance graphs (RRD files). |
| Enable traffic aggregation ports | Enables network monitoring ports for aggregated data tracking. |
| Disable traffic aggregation ports | Disables traffic aggregation ports, stopping data monitoring. |
IP Address Management
| Action name | Description |
|---|---|
| [IP Address Management] Assign Primary IP to Device (IPv4) | Assigns a Primary IP Address from the subnet pool to a device during provisioning. Automatically selected from a matching subnet. |
| [IP Address Management] Assign subnet (IPv4 & IPv6) | Attempts to automatically assign a subnet based on client preference (e.g., /30). Manual selection required if no match is found. |
| [IP Address Management] Unassign Primary IP from Device (IPv4) | Unbinds the assigned Primary IP Address from the device, returning it to the available pool. |
| [IP Address Management] Unassign subnets (IPv4 & IPv6) | Releases previously assigned subnets back to the general pool. |
IPMI Integration
| Action name | Description |
|---|---|
| [IPMI Integration] Create operator account | Creates an operator-level IPMI user (e.g., on Dell iDRAC or HP iLO) for remote server access. |
| [IPMI Integration] Delete operator account | Deletes the IPMI operator account to disable remote server access after termination. |
OS Installation
| Action name | Description |
|---|---|
| [OS Installation] Install operating system | Starts OS installation via EasyDCIM OS Installation module using a predefined template. |
| [OS Installation] Reinstall OS | Triggers reinstallation using the provisioning server’s defined Reinstall Template. |
Usage Collector
| Action name | Description |
|---|---|
| [Usage Collector] Set the monthly traffic limit (in/out) | Sets traffic limit based on service configuration. |
| [Usage Collector] Remove the monthly traffic limit (in/out) | Removes any existing traffic limits from the system. |
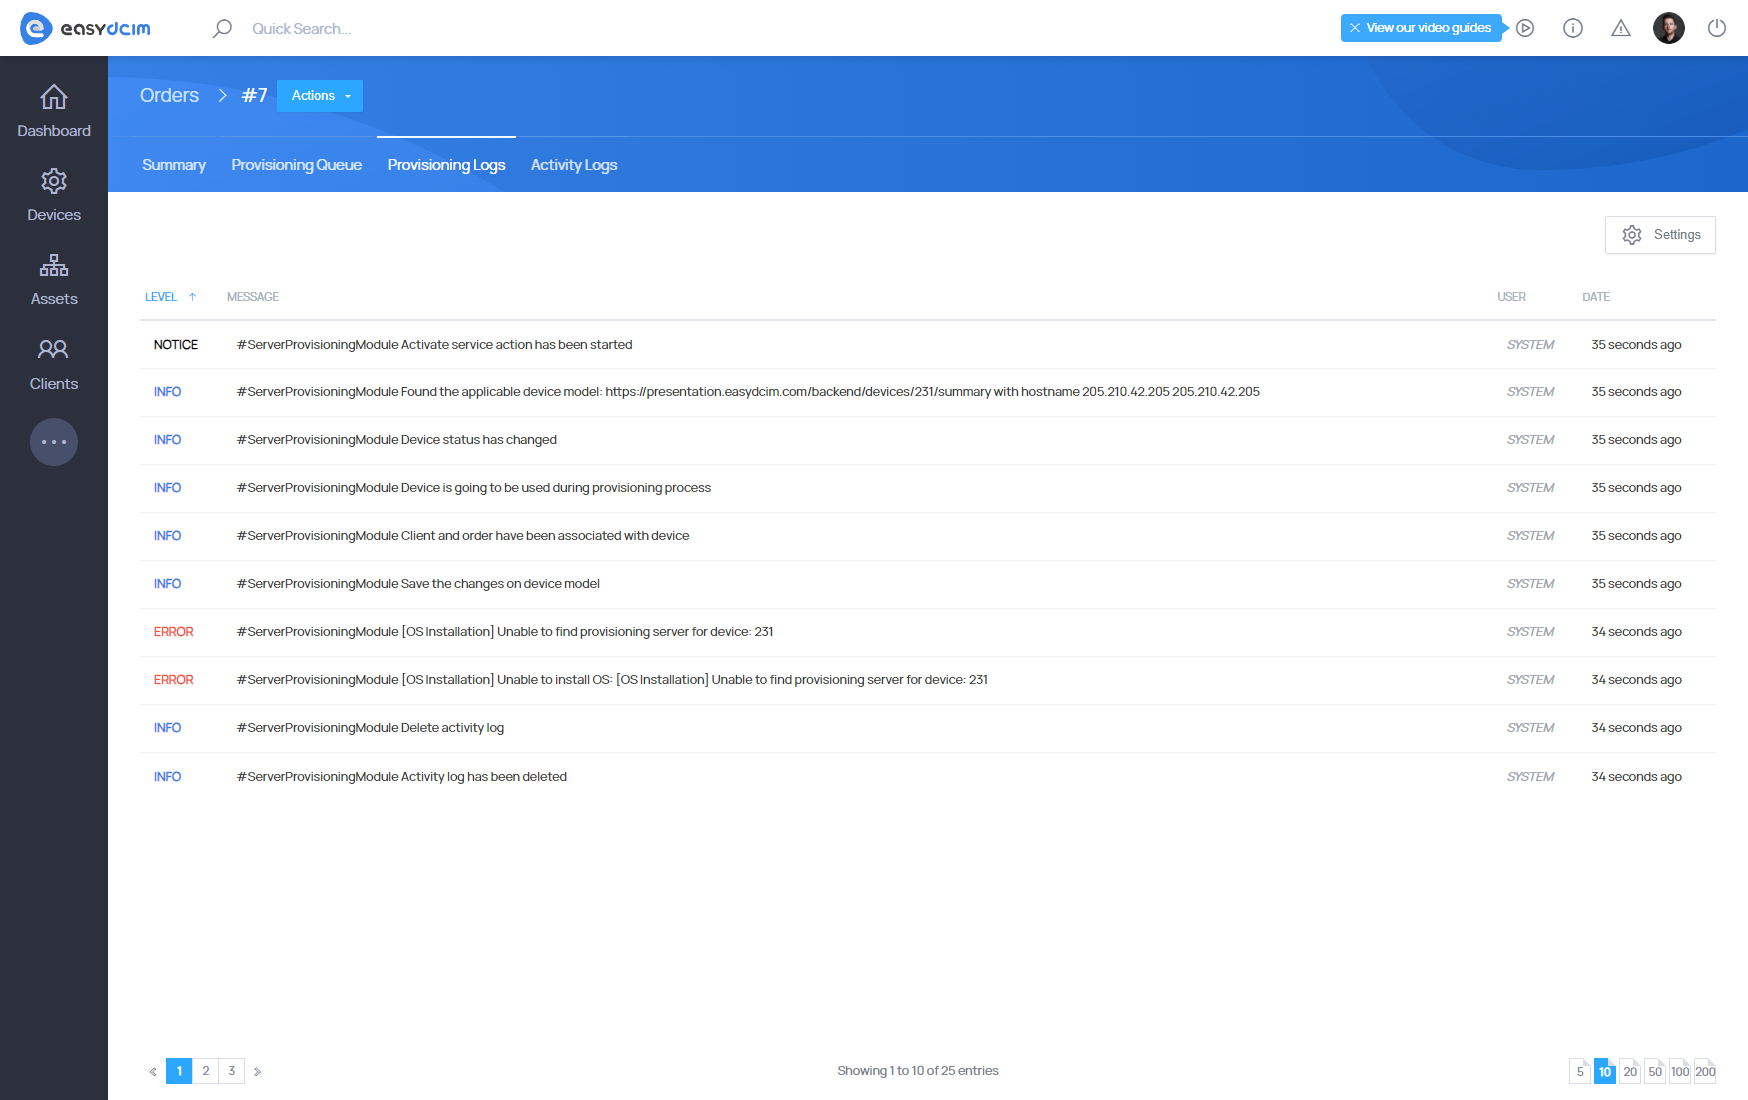
Provisioning Log
In case any of the provisioning steps fails, detailed information will be available in the Provisioning Logs tab.
Additionally, you can monitor the current progress and queued tasks in the Provisioning Queue tab, which provides real-time insight into the execution flow of provisioning actions.