Assigning Servers
Assigning devices to locations and racks
Assigning a server to the correct location and rack helps organize infrastructure and improve physical asset tracking.
- Go to the server’s summary view and select Edit from the Actions menu.
- In the Location & Client tab, set the server’s Location.
-
Move to the Rack & Position tab:
-
Choose a Rack from that location.
- Set Device Size (Units) and In Rack Size (orientation).
- Choose the appropriate position in the rack.
Servers larger than 1U will occupy multiple vertical slots from top to bottom.
After saving, the position becomes clickable from the server’s detail box, leading you directly to the rack view.
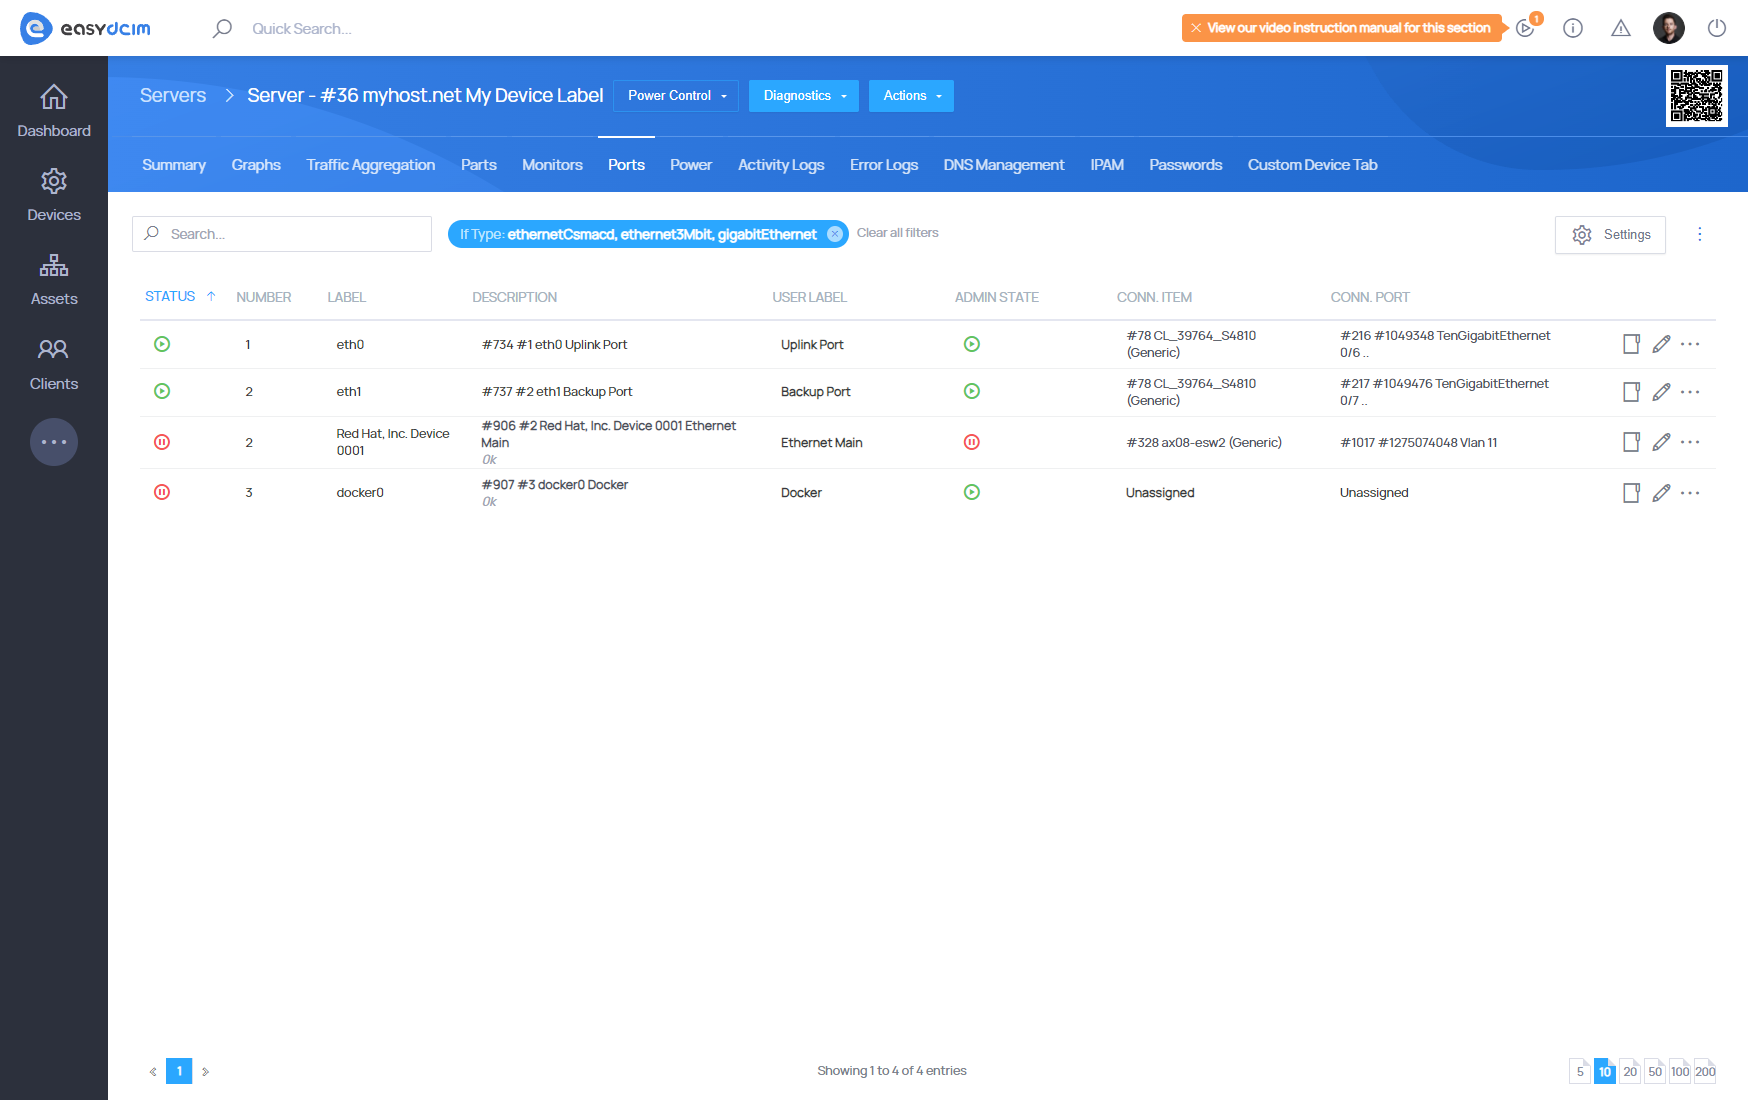
Connecting devices to switches
Connecting the server to the switch is very important from the perspective of both the administrator and the end client. It enables monitoring of the traffic and transfer usage, which eventually will allow you to charge customers using the preferred billing system.
- Go to the server’s Ports section.
- Use Add New Port to define its label and port number.
-
Once added, assign the port using:
- Connected Item – select the desired switch
- Connected Port – choose the switch’s port
To enable transfer monitoring:
- Navigate to Traffic Aggregation
- Use Configure to select one or more server ports responsible for aggregation
Most configurations use one port, but you can assign as many as needed.
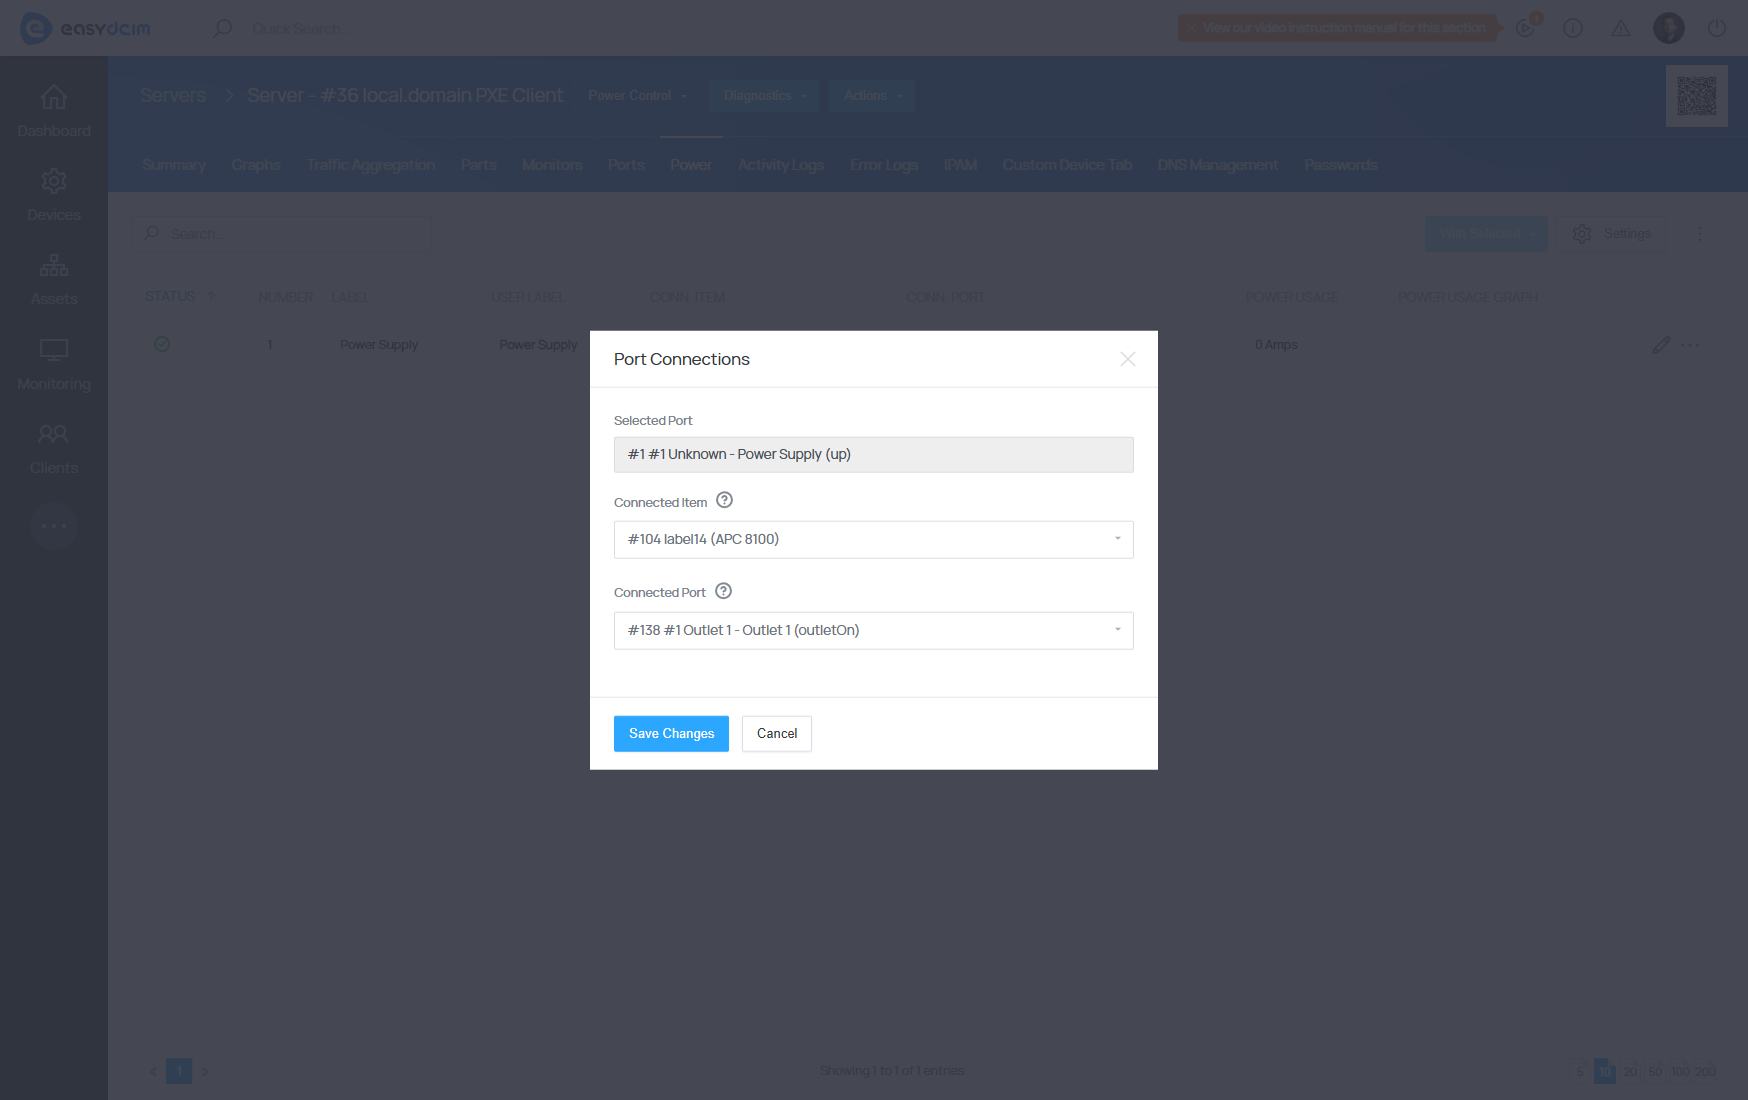
Connecting devices to PDUs
Connecting the device to PDU will prove useful if you do not have access to the IPMI configuration because it will allow you to remotely manage the status of a device.
- Go to the Power section of the server.
- Click Add New Port and fill in label and number.
-
Connect the port to a PDU:
- Connected Item → select the PDU
- Connected Port → choose the matching outlet
This allows remote power actions directly from the server’s summary view using Power Control.
Assigning servers to clients
Dedicated servers can be allocated to clients to allow their easy management either directly through the EasyDICM platform or via an external billing system. To enable an end client to manage a dedicated server, a corresponding order must be created first. The entire ordering process is described in detail in the Creating New Order section.
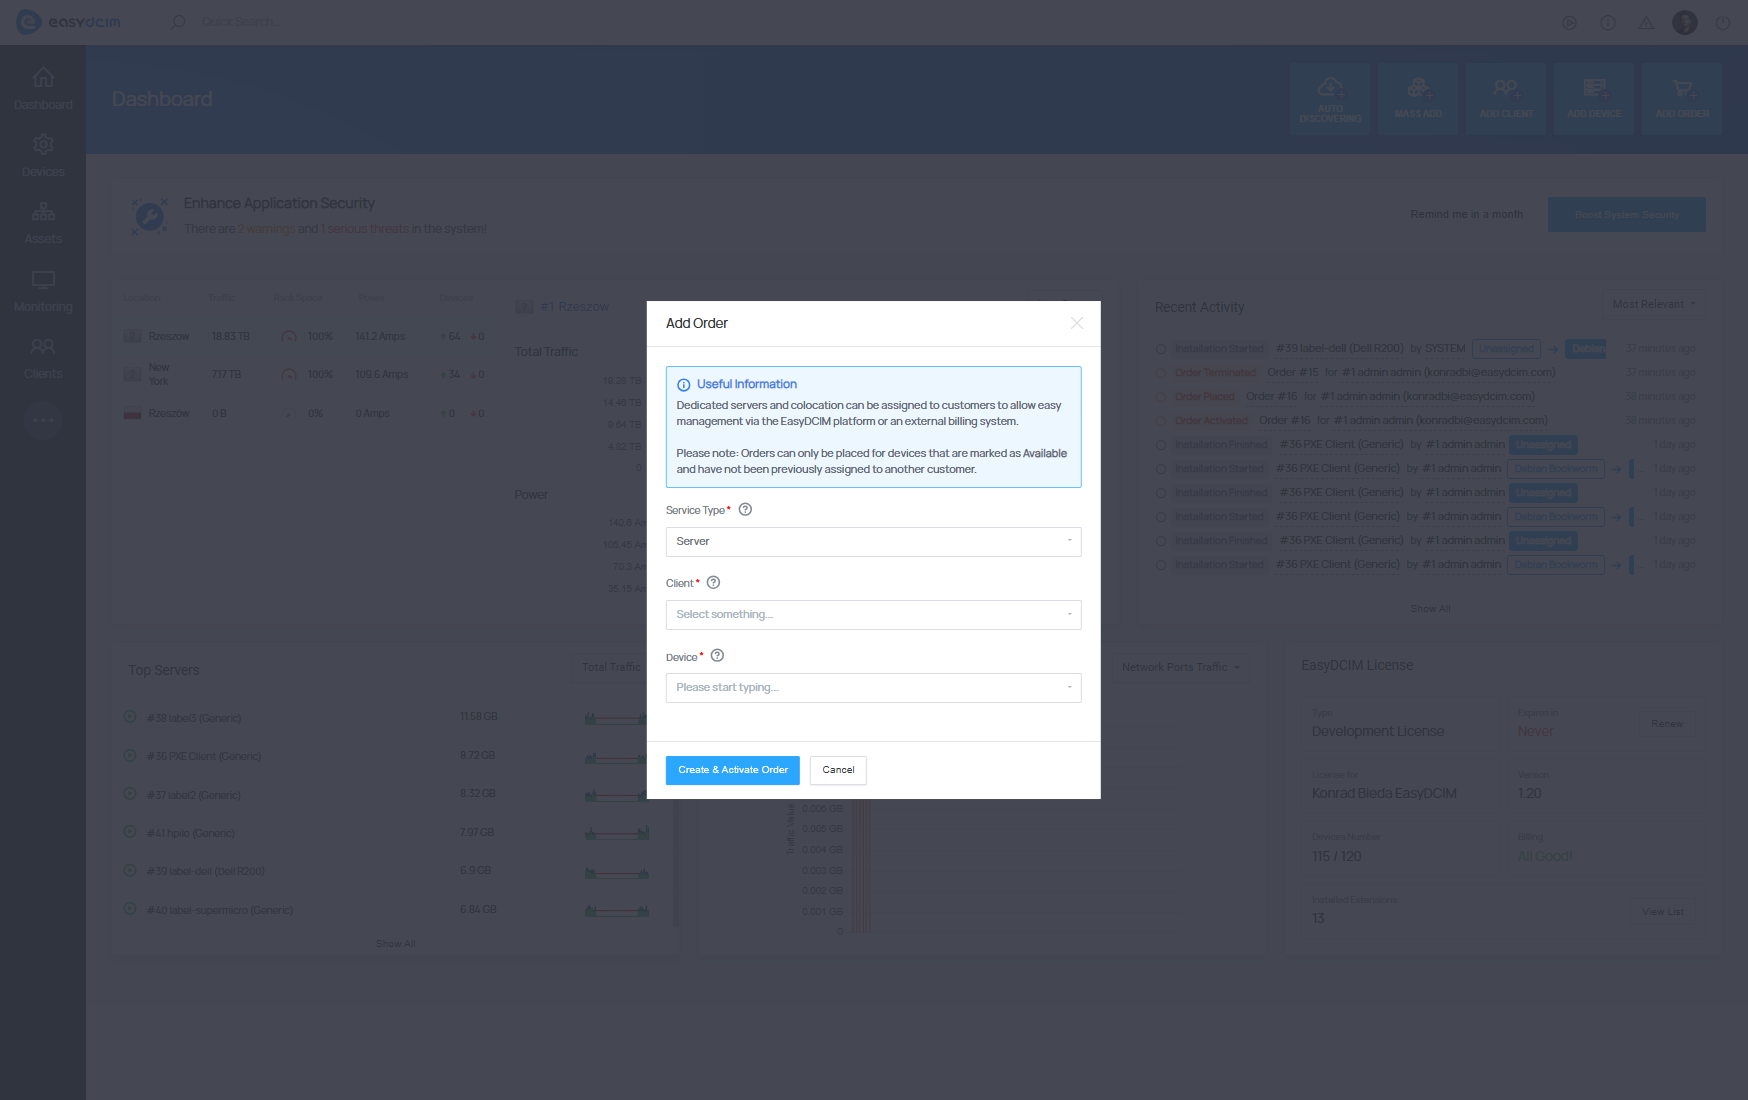
Once all the preceding steps are complete, the end client will be able to remotely manage the server by performing various actions, including:
- Reinstall the operating system,
- Execute the boot/reboot/shutdown actions,
- Access KVM console in a noVNC session,
- Monitor the outgoing and incoming transfer usage.
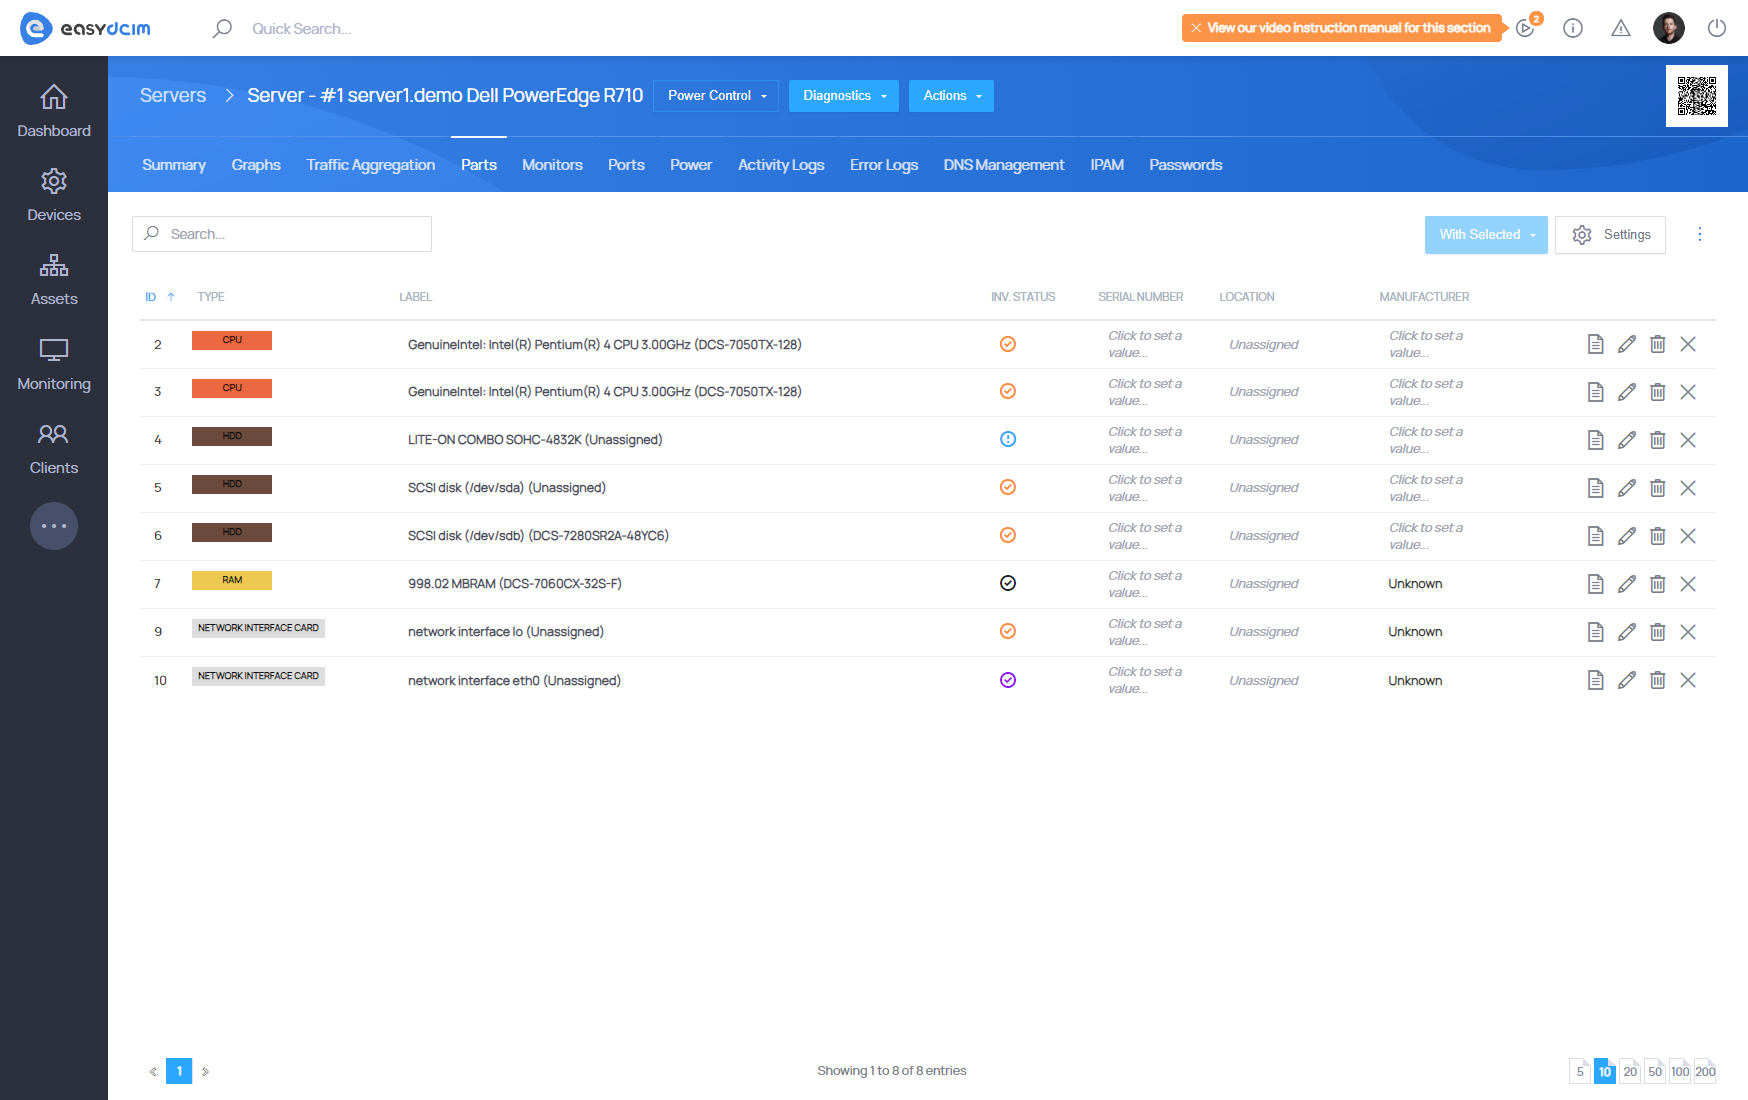
Assigning parts to devices
Each server contains base components, such as CPU, RAM, hard drive and motherboard. In order to manage your inventory in the data center more efficiently, you need to assign the appropriate parts to the servers. Each part of the server is a single item with unique properties.
- In the server’s Parts section, click Quick Create Part.
-
Fill in:
- Part Type and Model
- Label and Serial Number
- Quantity (how many identical parts to assign)
All parts are listed under Search Inventory in the Infrastructure section.
Unassigned parts become Available in inventory. If a part is no longer in use or available, you can remove it permanently.