


Adding New Server
In the system there are several options for adding a new server:
- add the device manually using the Add Single Device form (this option is recommended)
- add the device using the Discover Device
- add devices in bulk and import devices using the Mass Add Devices form
All the above methods have both advantages and disadvantages which will be described below in details.
Add Single Device Form
The Add Device form allows you to add a new device to your EasyDCIM inventory and configure all the essential parameters needed for remote management and automation. The wizard is divided into several steps so that each area of configuration is handled separately and clearly.
You can open it from Devices → Add Single Device.
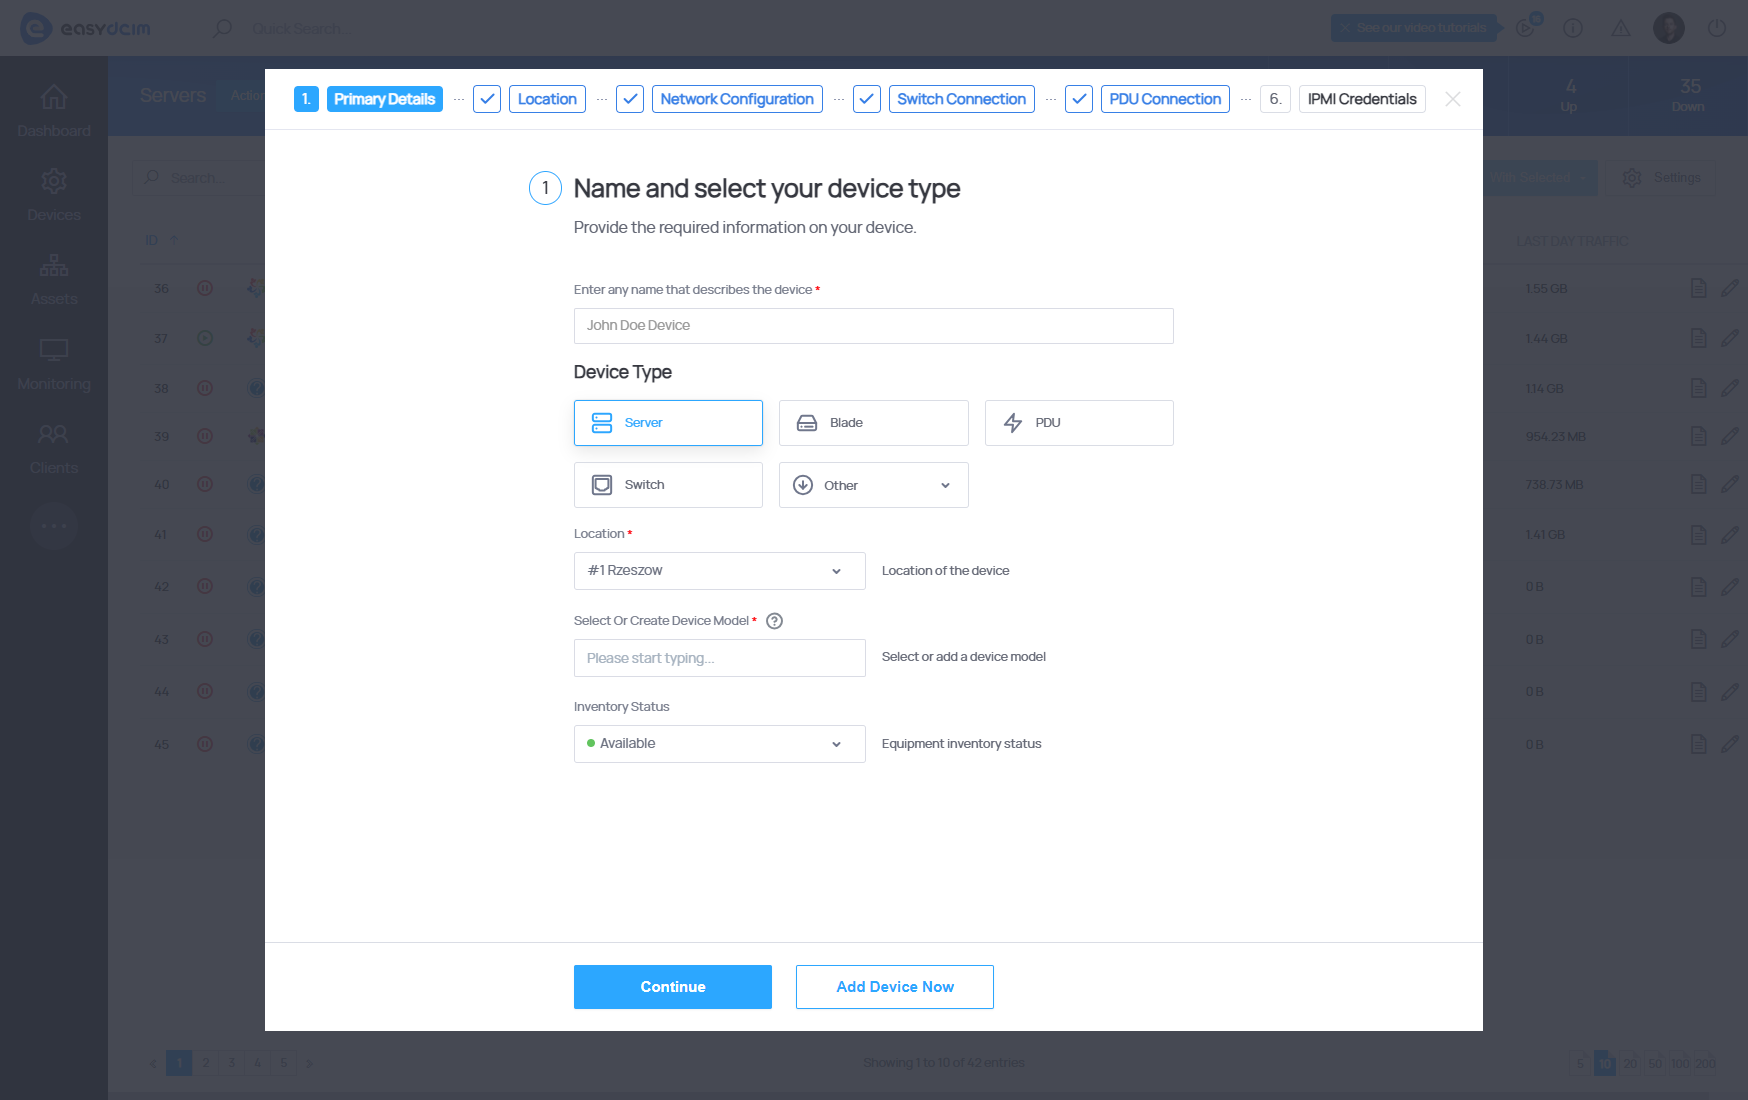
Step 1 – Primary Details
In this step, you define the basic identity and classification of the device. These settings determine what kind of hardware you are adding, where it belongs in your infrastructure, and how it is represented in the inventory.
Fields available in this section:
- Device Name: Any descriptive name that identifies the device in EasyDCIM.
- Device Type: Select the type of the device: Server, Blade, PDU, Switch, or Other. The selected type affects which subsequent steps and options are available.
- Location: The location where the device is installed or stored. This value also determines which remote agent will be responsible for handling OS installations and other automated tasks for this device.
- Select Or Create Device Model: Choose an existing device model or create a new one by typing its name. Device models store reusable hardware characteristics used by EasyDCIM.
- Inventory Status: The current inventory state of the device (for example: Available, In Use, Reserved). This helps track hardware lifecycle inside your infrastructure.
Step 2 – Location
Here you specify how the device is placed inside the rack cabinet. These parameters are used by EasyDCIM to visualize your racks and to precisely map physical positions.
Fields available in this section:
- Rack: The rack cabinet in which the device is located. The list of racks is generated dynamically based on the Location selected in Step 1.
- Rack Position: The starting rack unit (U) in which the device is mounted.
- Device Size (Units): The height of the device in rack units. For example, if you choose 3, the device will occupy 3U in the rack.
- In Rack Size: The mounting type of the device in a rack cabinet, such as Full width or other available options depending on your datacenter layout.
Step 3 – Network Configuration
In this step, you configure the network parameters that will be used for operating system installation and further device management. These values define how the device will communicate in your network.
Fields available in this section:
- IP Address: Main IP address of the device.
- Additional IP Addresses: Any additional IP addresses assigned to the device. You can enter multiple values separated by commas.
- Hostname: Hostname of the device that will be configured on the target system.
- MAC Address: MAC address of the main network interface of the device. Use the following format:
XX:YY:ZZ:AA:BB:CC. This is used by the DHCP server to assign the correct IP during OS installation. - Gateway: The default gateway that will be used in the configuration of network interfaces on the target server.
- Netmask: Subnet mask that will be used in the configuration of network interfaces on the target server.
- Firmware: Firmware on which the device is based. Depending on the software, the application loads the appropriate driver to operate the device.
Step 4 – Switch Connection (optional)
This step lets you link the device to a network switch. By defining this relationship, EasyDCIM can monitor incoming and outgoing traffic on the corresponding switch port.
Fields available in this section:
- Switch: Select the switch to which the device is connected. You can connect the server to the appropriate switch port to monitor network traffic.
- Switch Port: The switch port to which this server is connected.
- Test Connection → Quick Connection Test: Uses the button located below to verify if your switch is configured correctly and reachable from EasyDCIM.
Step 5 – PDU Connection (optional)
In this step, you associate the device with a PDU (Power Distribution Unit). Once configured, the device can be powered on or off remotely through EasyDCIM.
Fields available in this section:
- Power Device: Select the PDU that supplies power to this device. You can connect the server to the appropriate PDU outlet to manage power operations remotely.
- Power Outlet: The power outlet to which this server is connected.
- Test Connection → Quick Connection Test: Uses the button located below to verify if your PDU is configured correctly and accessible.
Step 6 – IPMI Credentials (optional)
The final step lets you configure access to the device’s IPMI or Redfish interface. With valid credentials, EasyDCIM can provide KVM access, power controls, and hardware sensor monitoring.
Fields available in this section:
- IPMI IP Address: Static IPv4 address of the IPMI or Redfish interface.
- IPMI Username: Username used to authenticate to the IPMI controller.
- IPMI Password: Password used for IPMI authentication. You can reveal the value temporarily using the Show button.
- IPMI Board Type: IPMI board type (for example, a specific vendor such as ASRockRack). This helps EasyDCIM choose the correct tools and commands for remote access.
- Redfish Support: Toggle that enables or disables Redfish-based access for this device.
- Test Connection → Quick Connection Test: Uses the button located below to verify if your IPMI is configured correctly and reachable.
Discover Device form
The Discover Device form allows you to add a server based on data retrieved using the SNMP protocol. Please note that this form is mainly useful for network devices such as switches and routers. In the case of servers, the data retrieved may not be accurate. This form is available from the side menu Devices → Auto Discovering.
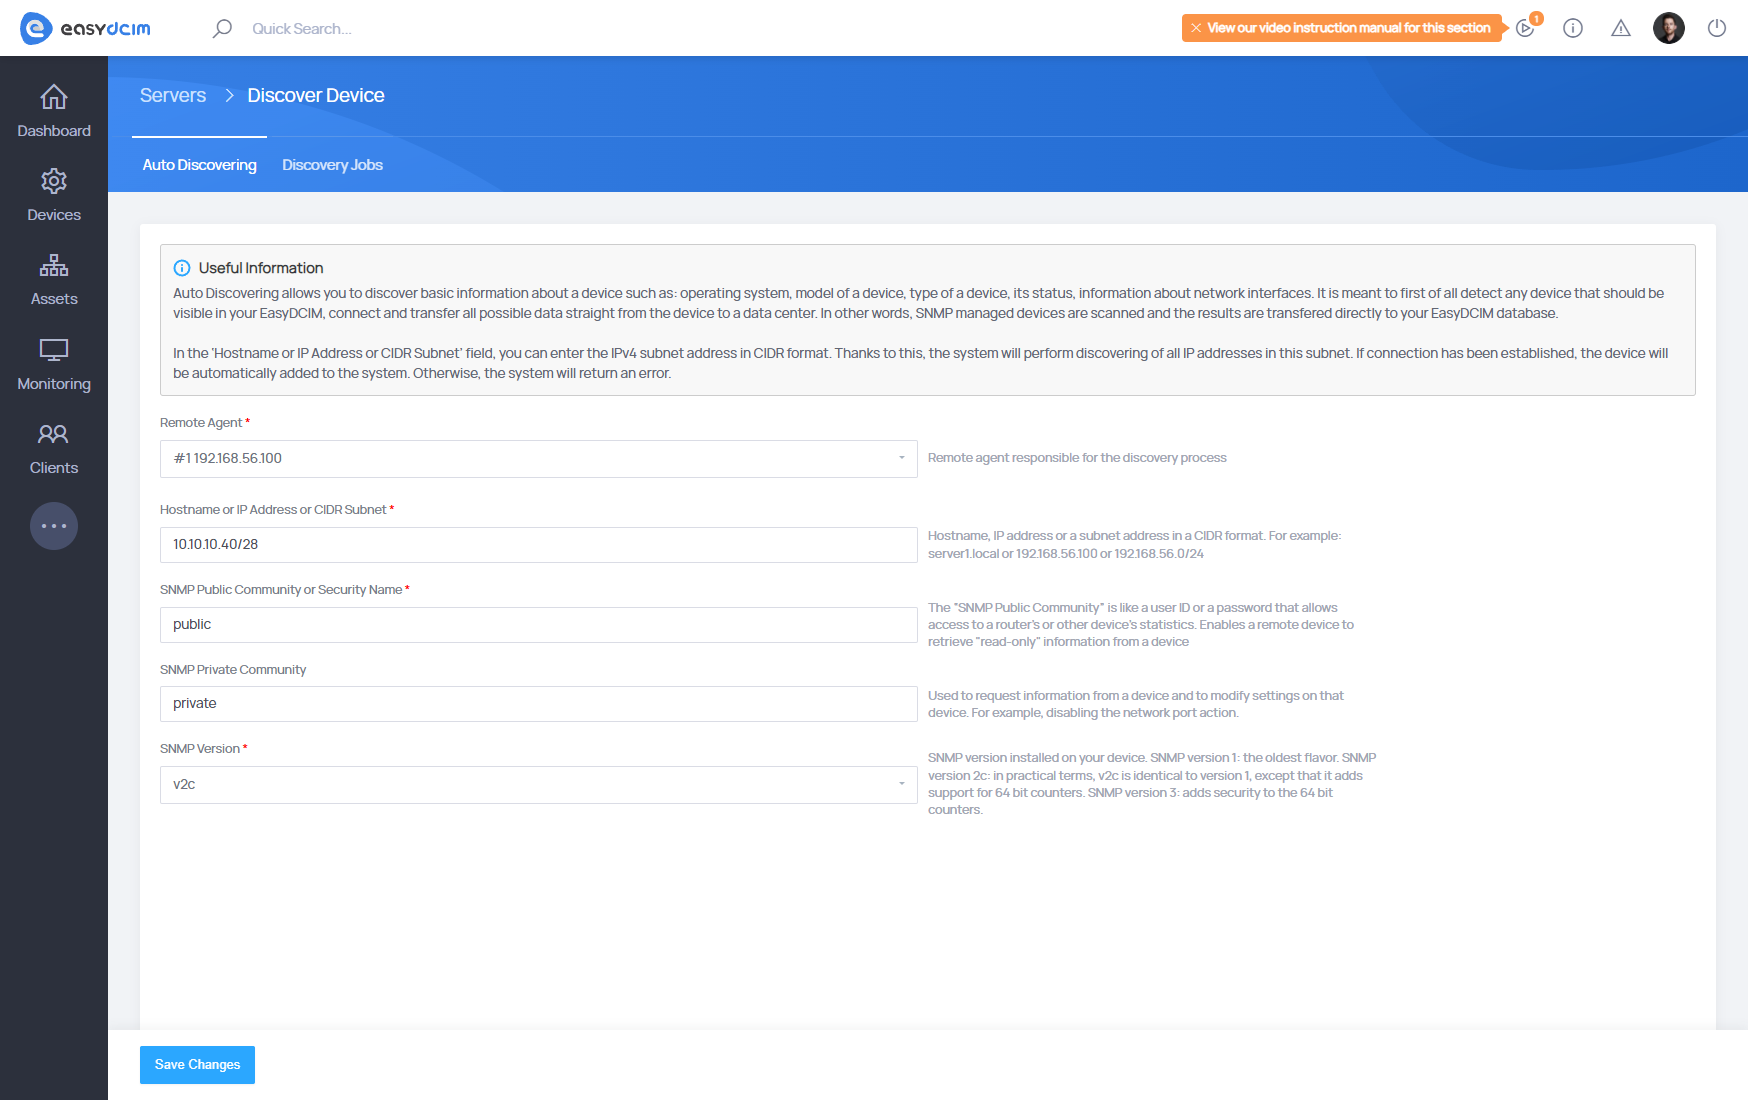
In the first step, you can specify SNMP access credentials and also select a remote agent:
- Remote Agent - a remote agent responsible for connection via SNMP
- Hostname or IP Address or CIDR Subnet - IP address, hostname or a subnet address in the CIDR format
- In the cases of SNMP v1 or SNMP v2
- SNMP Public Community - a public SNMP community that should have read-only rights. Used in the process of retrieving data from SNMP
- SNMP Private Community - A private SNMP community that should have write rights. Used for processes such as: disabling and enabling network ports, disabling and enabling power outlets
- In the cases of SNMP v3
- The Security Name, SNMPv3 Security Level, SNMPv3 Authentication Protocol, SNMPv3 Authentication Pass Phrase, SNMPv3 Privacy Protocol, SNMPv3 Privacy Pass Phrase fields are specific fields for SNMP Version 3 configuration and must be completed according to your device’s SNMP settings.
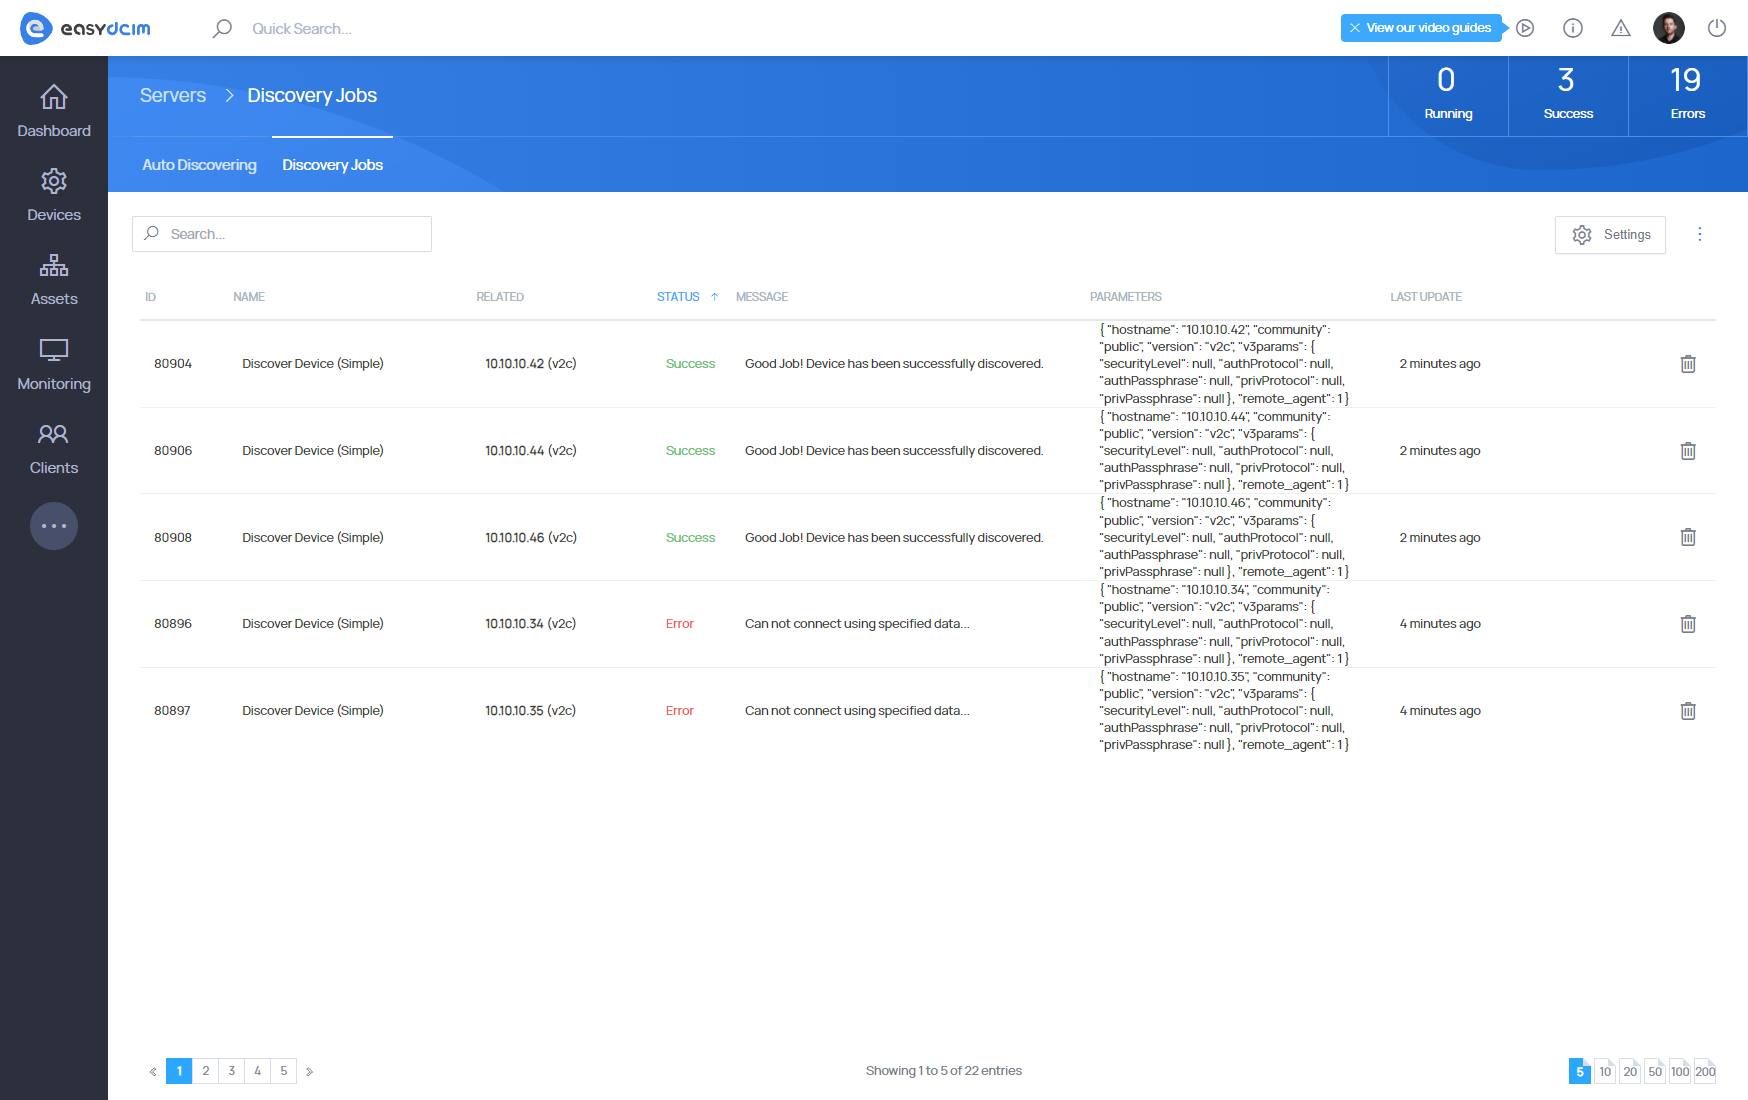
If the SNMP connection can be established, then the server will be added to EasyDCIM and then EasyDCIM will perform automatic advanced discovery of this device in the background.
Mass Add Devices
The Mass Add Devices section allows you to add an unlimited number of devices to EasyDCIM in bulk. These can be devices such as:
- Servers
- Blade Servers
- Switches and Routers
- PDU
The Add Devices form is presented in the form of a table with predefined columns. By selecting a device type, the system automatically determines available columns and generates an appropriate table based on them. By default, the table has 10 rows, but you can add and remove appropriate rows using the “Add Rows” and “Remove Selected” buttons.
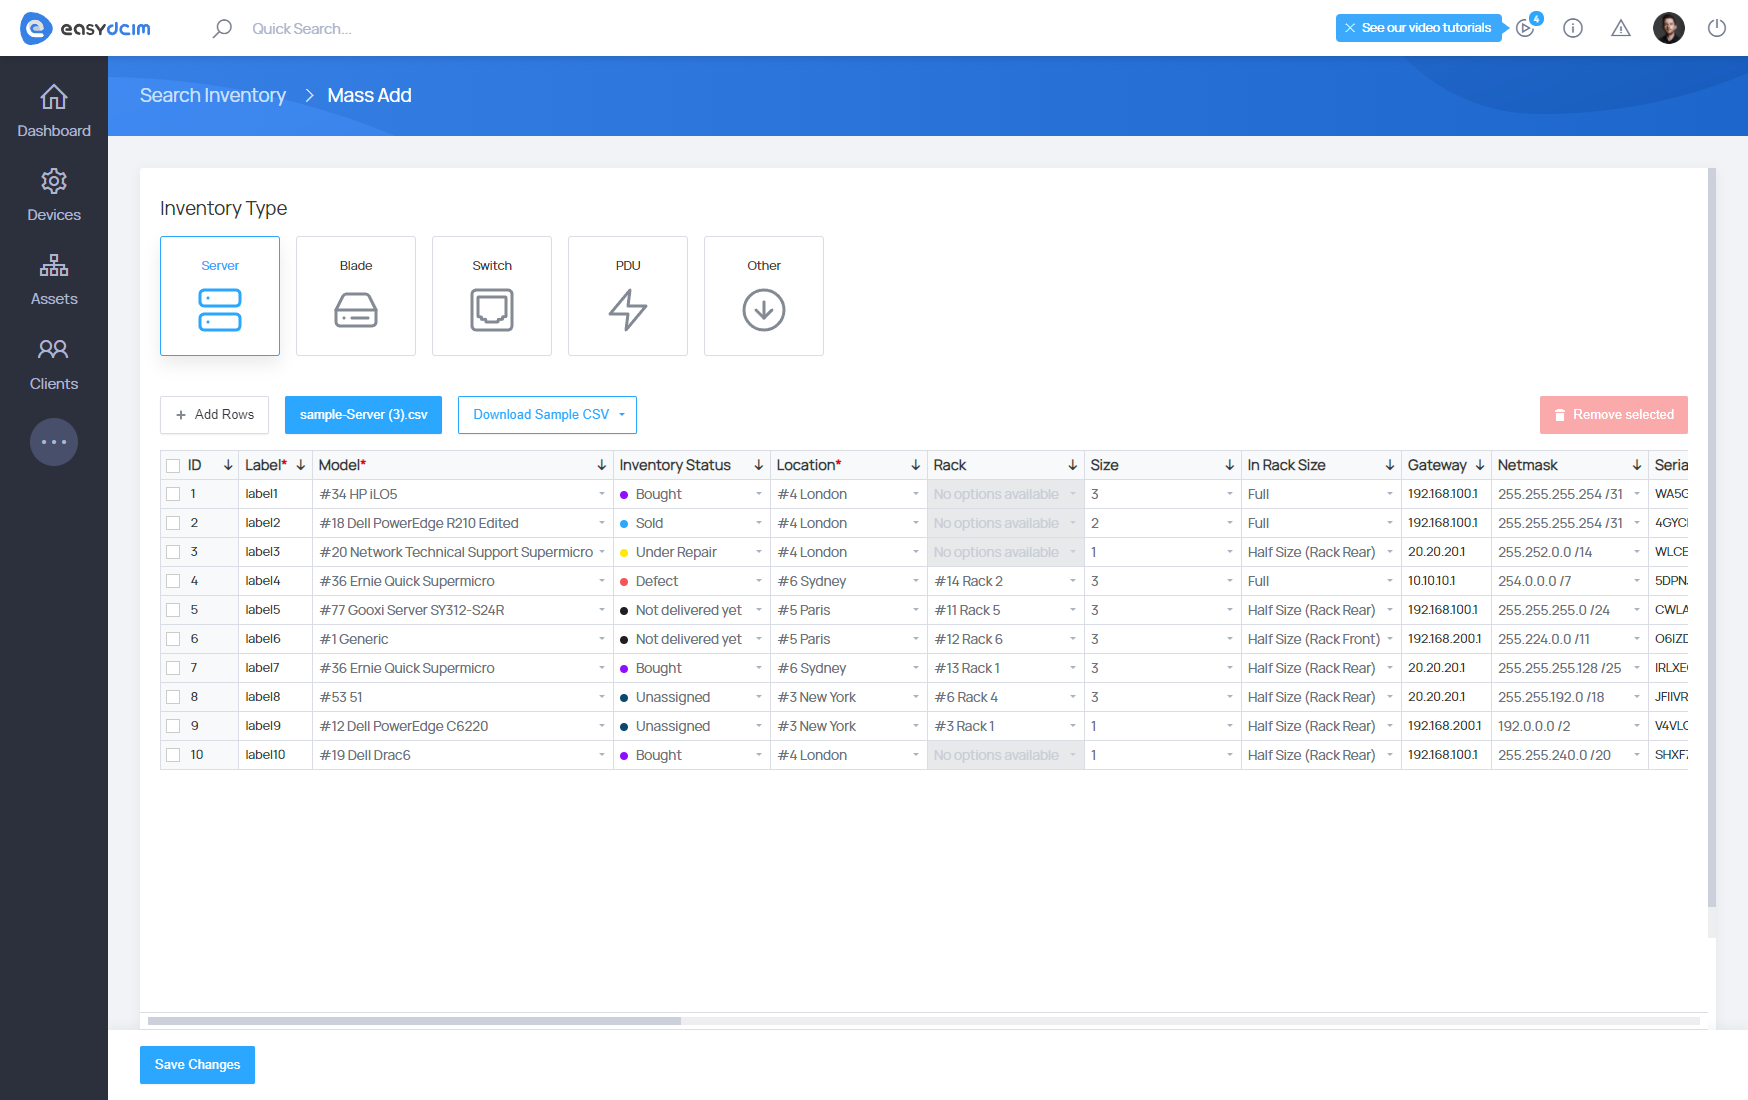
You must remember that some entities in the system should be added and configured beforehand. These are, for example, device models, locations and racks. Based on the entities available in the system, the system will be able to generate a table with appropriate options for the columns.
In order to add multiple servers to EasyDCIM, select the Server type. The table will be automatically generated. Now, the administrator must populate the table with the appropriate values corresponding to his configuration. The required fields that must be completed for each device type are:
- Device Model - the list is generated on the basis of available device models in the system
- Location - the list is generated based on the available locations in the system
- Label - any device label
The table also allows you to configure key network options, such as:
- Primary IP Address
- Additional IP Addresses
- Gateway
- Netmask
- Hostname
- IPMI Configuration - IP address, user name, user password, driver for JAVA KVM console
After completing all the data, click the “Save Changes” button. If there are no errors, the devices will be added to EasyDCIM and the administrator will be redirected to the list of added devices.
Importing devices
Importing devices is possible with the “Mass Add Devices” function described above. There is also an option “Download Sample CSV”, which contains sample and data-filled CSV files. Based on these files, the administrator can prepare an individual data file with information about the devices in his data center.
When the CSV file is ready, use the “Import From CSV” option and attach the appropriate file in the “.csv” format. The values for the corresponding rows will be automatically imported into the table.
Finally, click the “Save Changes” button. If there are no errors, the devices will be added to EasyDCIM and the administrator will be redirected to the list of added devices.

