Migration Guide
Migration is a complex process that demands significant attention from the data center administrator. EasyDCIM platform provides a variety of additional options and mechanisms designed to accelerate the migration of data from other systems.
Step 1: Migrating locations, floors and racks
Locations, floors, and racks must always be added manually to EasyDCIM. However, this process is quite fast and does not require much effort on your part. When adding a location, it is crucial to properly configure the remote agent by setting up the following options:
- Subnet configuration for DHCP server
- Configuration of device polling process
- IPMI Proxy server configuration
After completing the above steps, your locations will be pre-configured, and you can begin the process of adding devices.
Step 2: Importing servers from a CSV file
The process of device migration is complicated and can take a lot of time. EasyDCIM has a number of mechanisms that allow the administrator to shorten this process.
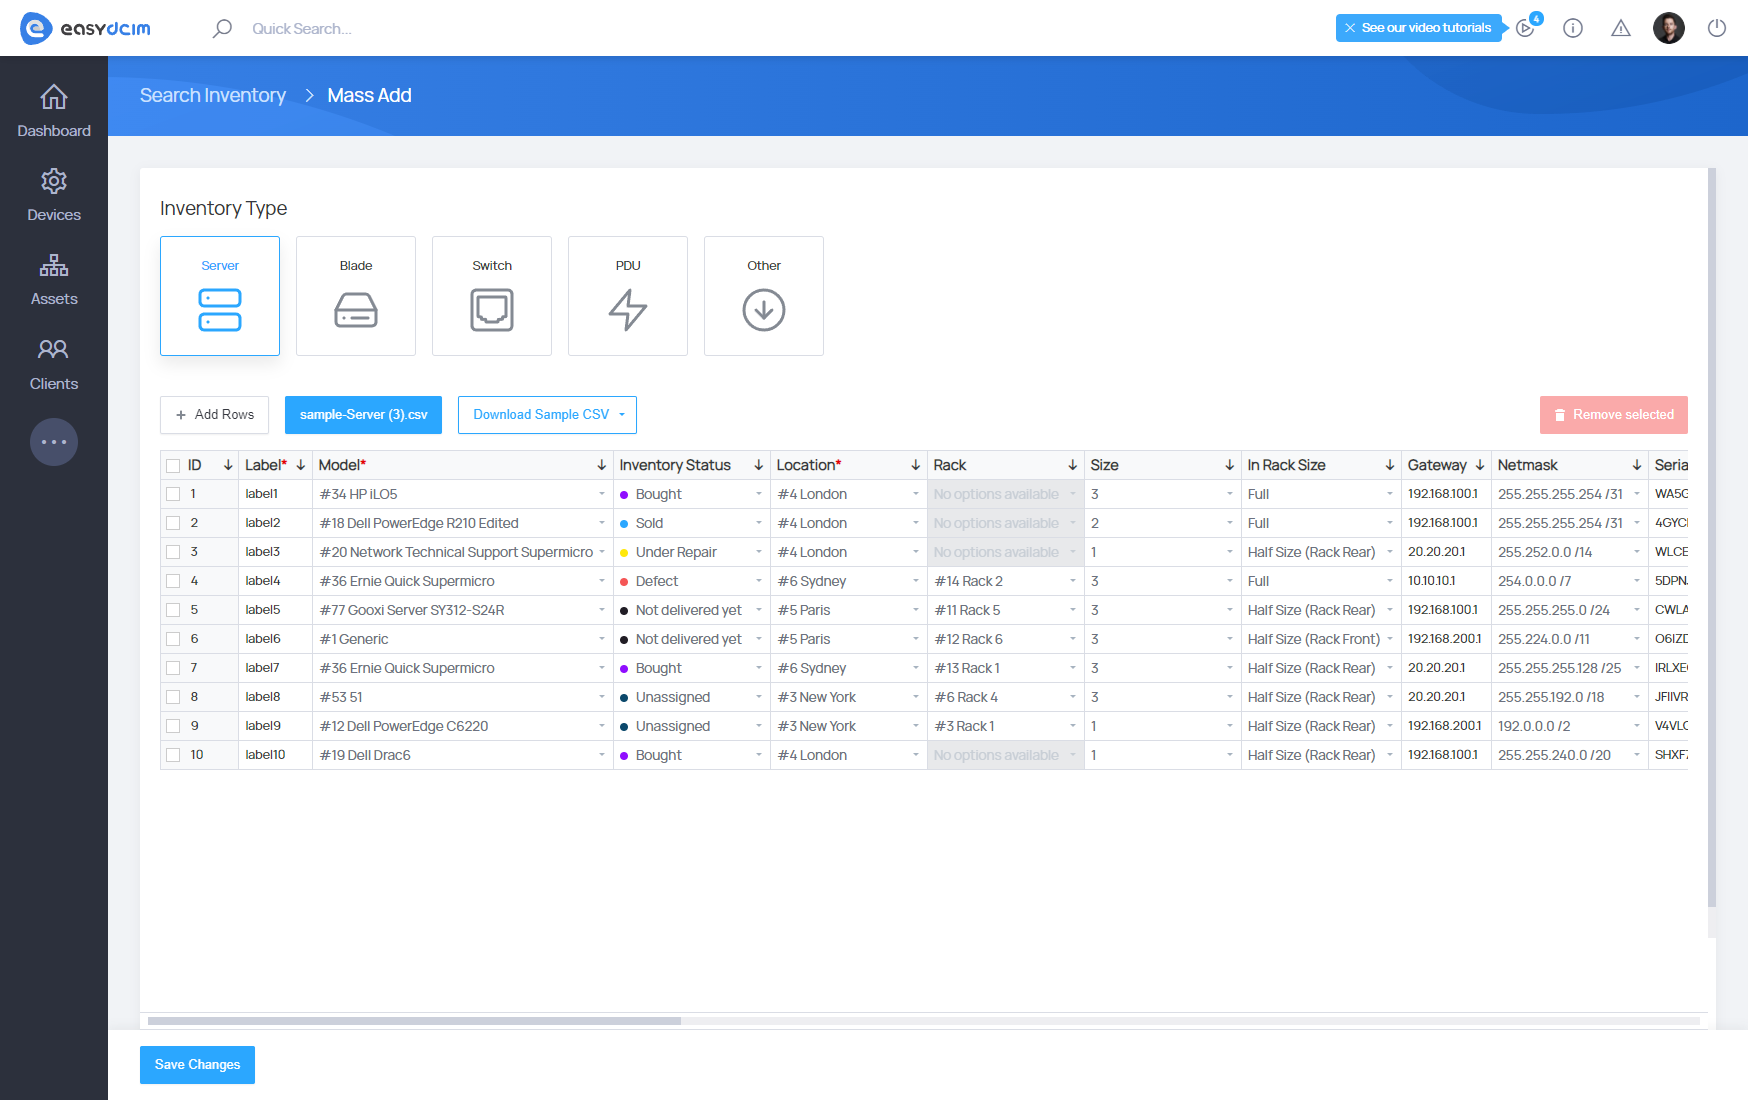
Importing devices using a CSV file is the fastest way to add hundreds of servers to EasyDCIM in a short amount of time. In the Mass Add Devices section, you can find and download sample CSV files that include relevant columns and exemplary values. Based on these files, an administrator can prepare a customized data file with information about the devices in their data center.
When the CSV file is ready, please use the “Import Form CSV” option and upload the appropriate file in a “.csv” format. The values from the corresponding lines will be automatically imported into the relevant tables.
Important! Be sure not to assign devices to users and orders during import. This process will be described in the following steps. If there are no errors, the devices will be added to EasyDCIM and the administrator will be redirected to the list of added devices.
Step 3: Migrating network devices
Network devices, such as switches, routers, or PDUs, must be added manually to EasyDCIM using the Discover Device form.
The “Discover Device” form allows you to add a network device using data fetched via the SNMP protocol. You can find this form in the side menu under Devices → Auto Discovering.
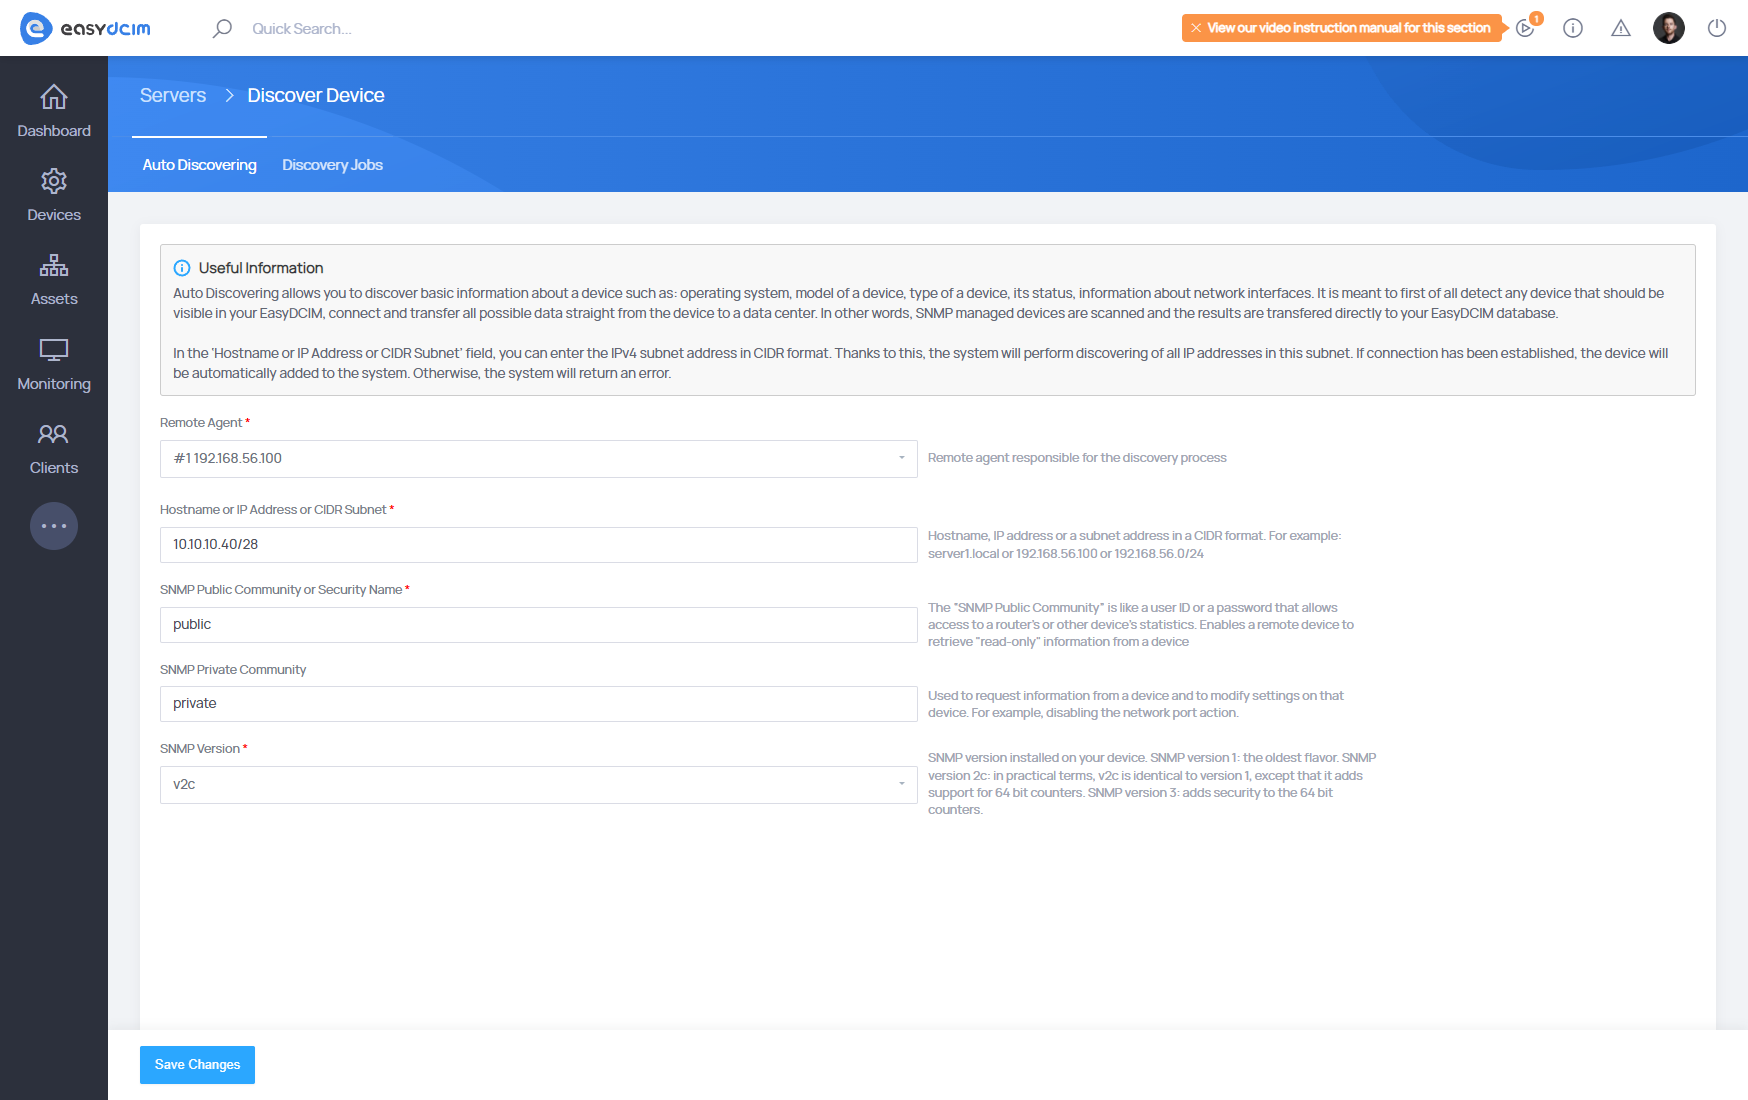
After all network devices are successfully added to the EasyDCIM control panel, proceed to the “Ports” section, which can be found under Assets → Ports. There, you will find a list of all network ports in EasyDCIM. From this section, you can create the appropriate connections between network ports and server ports. You can read more about this process in the Connecting devices to switches section.
Step 4: Assigning clients to servers via WHMCS
Dedicated servers can be shared with clients, allowing for easy management directly from EasyDCIM or through an external billing system like WHMCS. In order to allow the end customer to manage the dedicated server, you must first create a corresponding order. You can create orders using:
- An external billing system such as WHMCS.
- Directly in the EasyDCIM backend section.
1. Server, product and order configuration in WHMCS
EasyDCIM offers a dedicated module for managing dedicated servers directly within WHMCS: EasyDCIM Dedicated Servers For WHMCS
This is the best way to quickly connect a client account to the appropriate dedicated server. The first step is to properly configure the connection between WHMCS and EasyDCIM. This entire process is described in detail in the official module documentation: Installation and Configuration.
Follow the steps below to complete the configuration:
- Configure the WHMCS server for EasyDCIM API.
- Set up the appropriate products in WHMCS.
- Create an order for the client from within WHMCS.
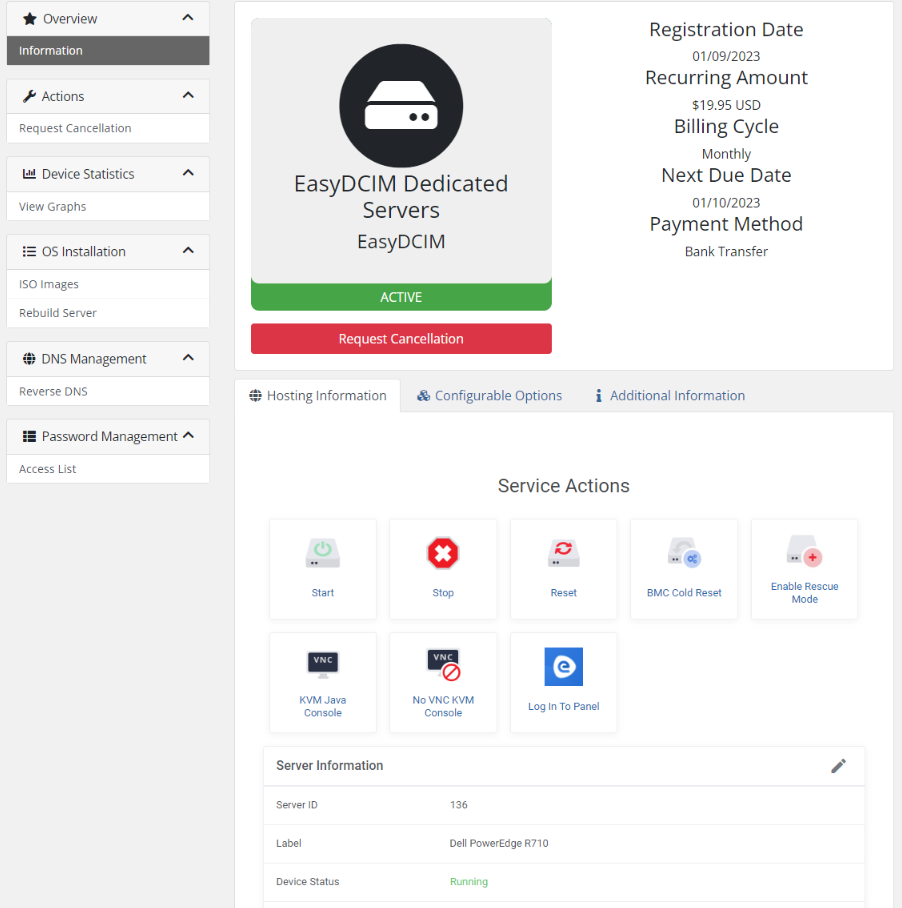
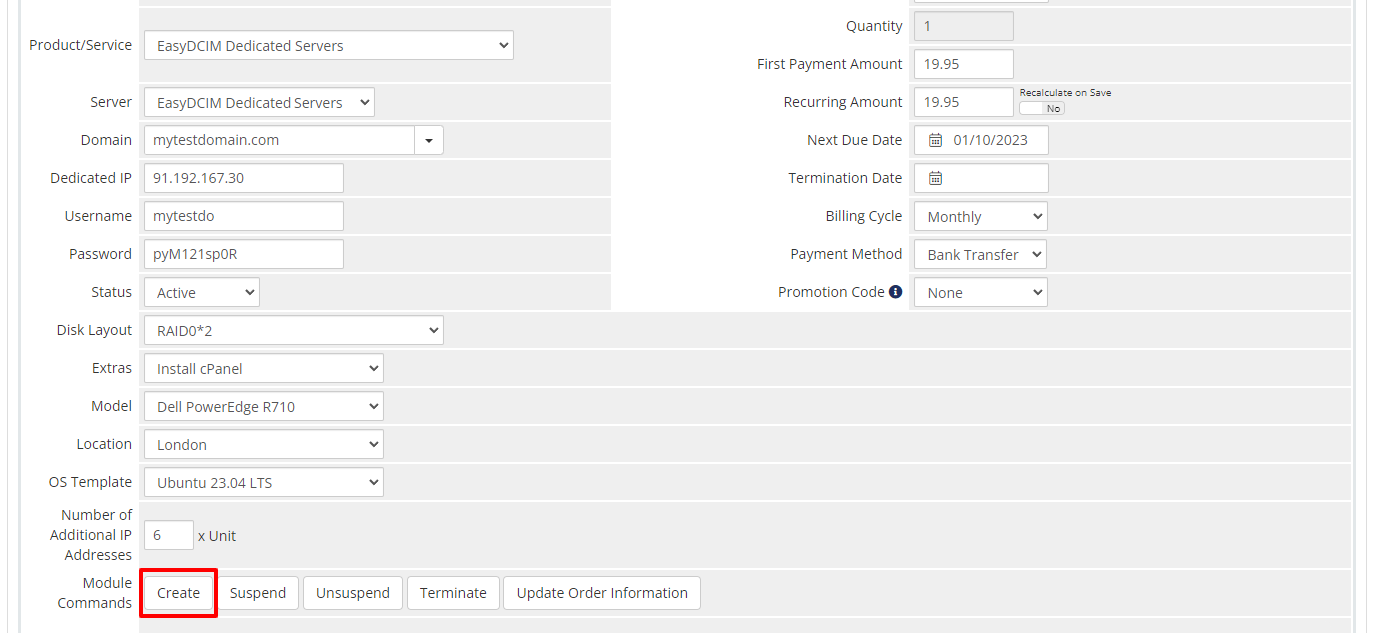
2. Creating an order automatically in EasyDCIM using WHMCS
Once the above steps are completed, go to the service summary view in WHMCS and use the “Create” function, which will:
- Automatically create a client account in EasyDCIM based on the email address from WHMCS.
- Automatically create an order in EasyDCIM with the appropriate criteria.
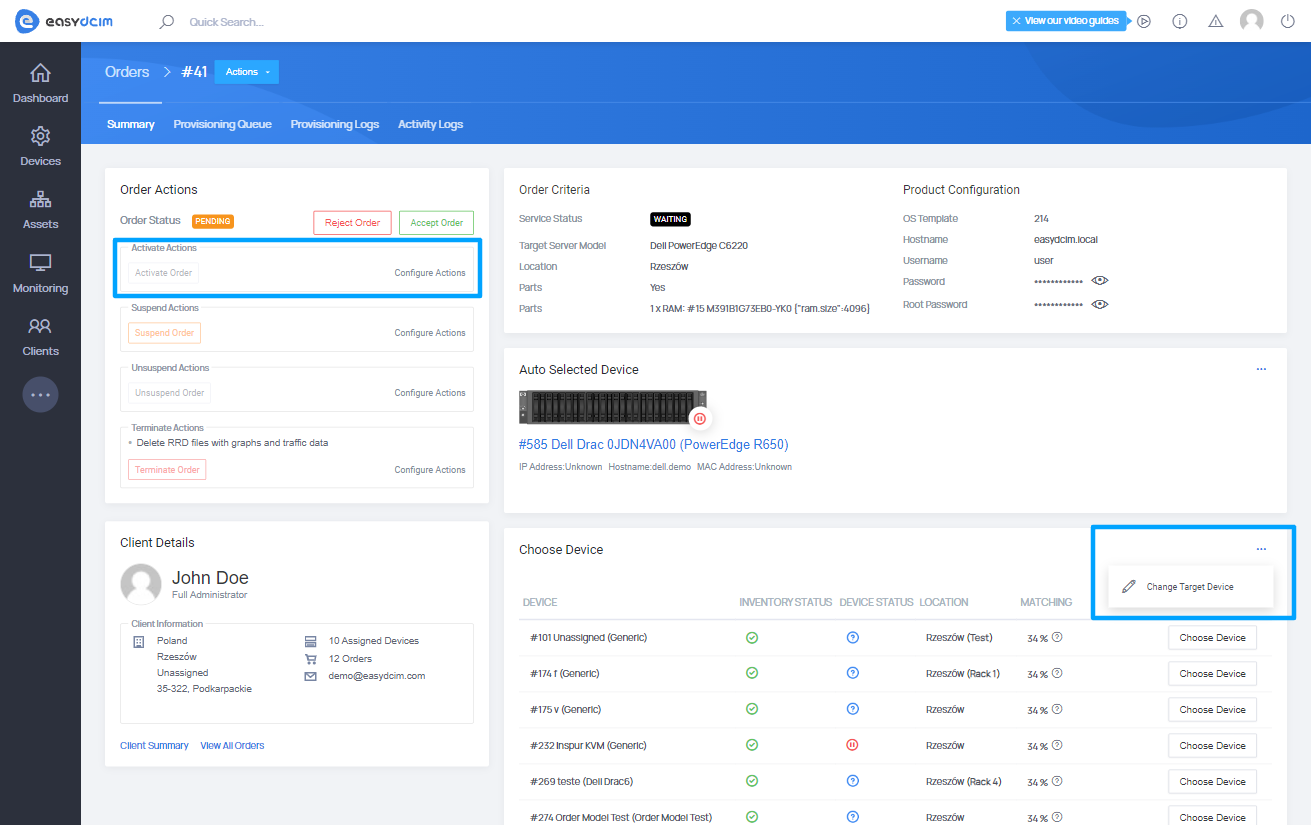
3. Accepting an order from EasyDCIM
The final step is to proceed to the order view in EasyDCIM and connect the server with the newly created order. This process is detailed in the Assigning servers to clients section.
That’s it! After a few minutes, the WHMCS module cron will automatically synchronize data with EasyDCIM, and your client will be able to manage the dedicated server from the client area in WHMCS.