


Client Area Configuration
The Client Area is the front-end interface dedicated to your end users. It allows clients to manage their services, access IPMI consoles and perform other account-related actions.
In EasyDCIM 1.25.0+, the Client Area runs as a Docker-based service managed by easydcim-control. For the general CLI workflow, see Docker Management with easydcim-control.
Deployment modes
Local Client Area (same host as EasyDCIM)
This is the default mode for a standard single-server deployment.
- It is usually installed automatically by
easydcim-control app install. - It uses ports 8444 (HTTP) and 8443 (HTTPS).
- It is exposed through the built-in
/clientpath on the main EasyDCIM domain. - It shares the same SSL configuration as the main EasyDCIM App.
External Client Area (separate host)
Use this mode when you want the Client Area to run on a different server or a dedicated public domain.
- It uses ports 80 (HTTP) and 443 (HTTPS).
- It is available directly at the root of its own domain or subdomain.
- It communicates with the EasyDCIM backend through APIv3.
- SSL is managed independently from the main EasyDCIM App.
Requirements
Before installing the Client Area, make sure that the target environment meets the following requirements.
System requirements:
- Debian 12 (bookworm) or Debian 13 (trixie)
- root or
sudoaccess - at least 4 GB RAM and 4 vCPU (recommended minimum)
Network requirements:
- The Client Area host must be able to communicate with the EasyDCIM backend over HTTP/HTTPS.
- If you use proxied noVNC sessions, allow communication required for Websockify traffic as described later in this guide.
Backend configuration fields
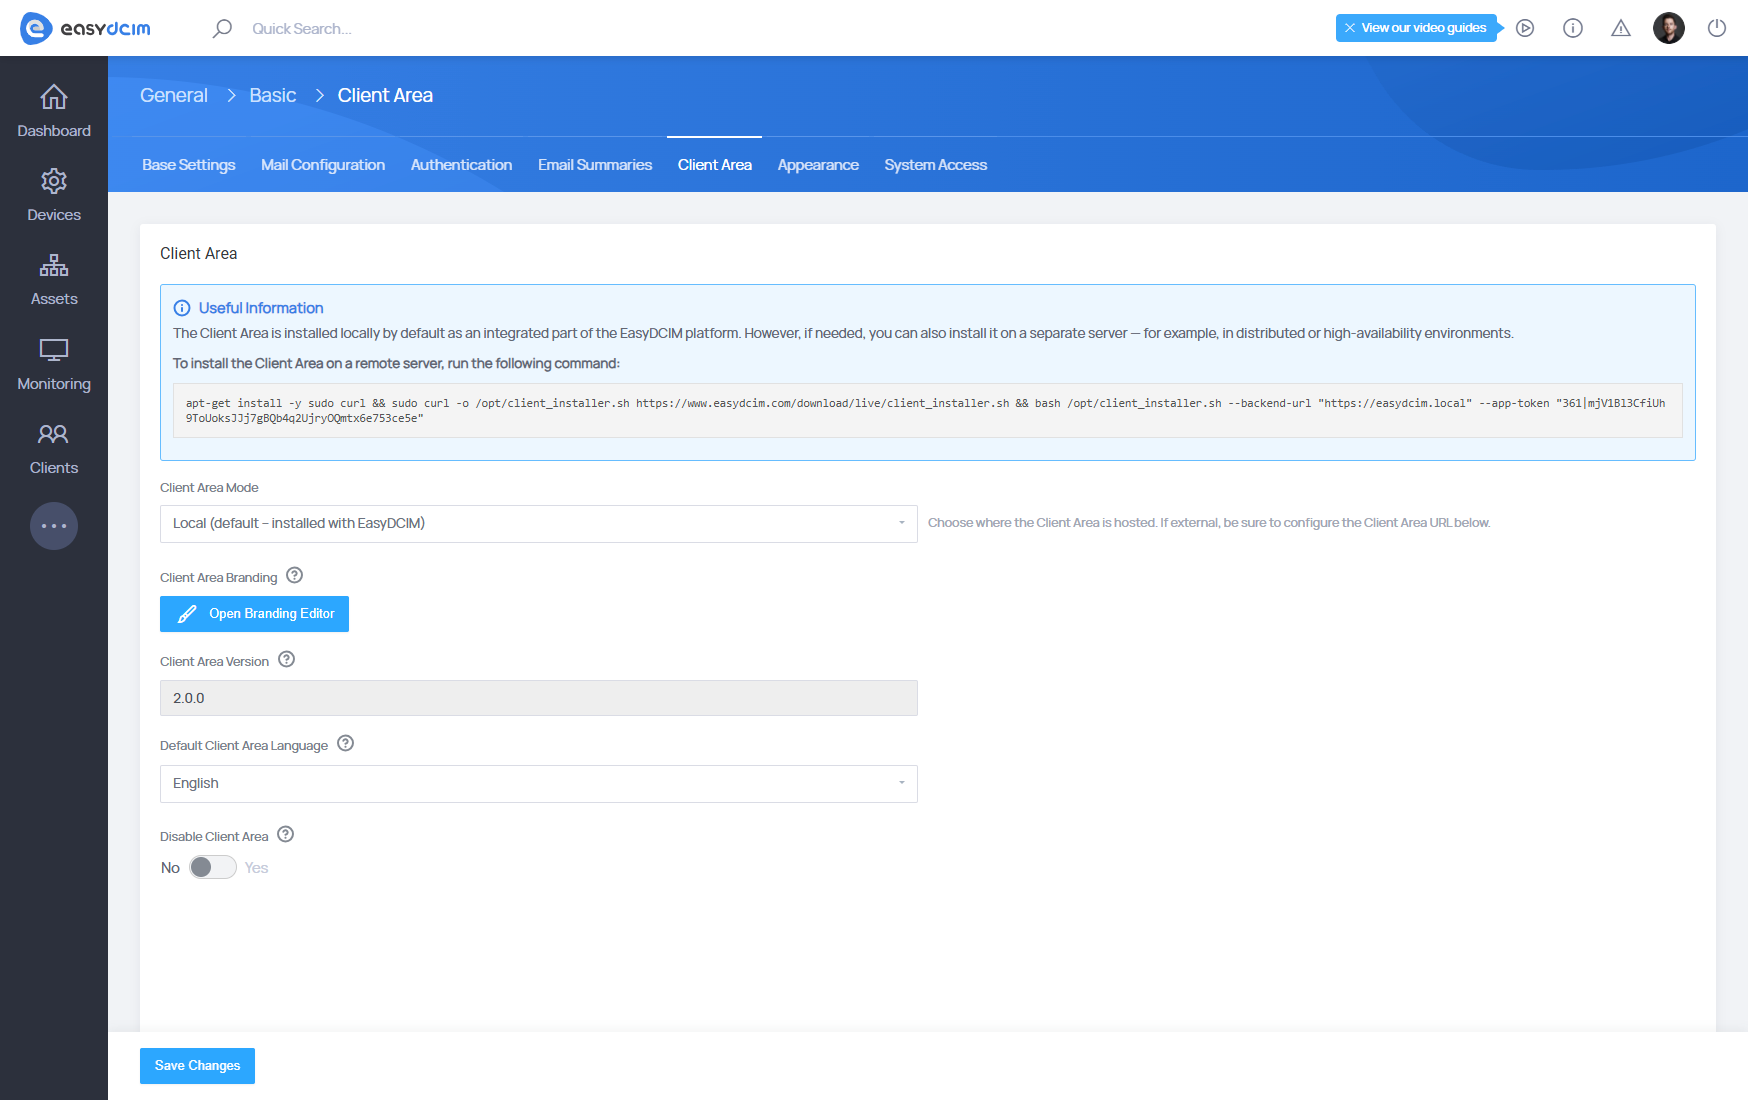
Within the Settings → Basic → Client Area section, you can configure all backend parameters related to the Client Area connection and behavior:
- Client Area Mode – Defines where the Client Area is hosted:
- Local – Installed and integrated directly within the EasyDCIM instance (default).
- External – Hosted on a separate remote server.
- Client Area Branding – Opens the Branding Editor, where you can adjust the logo, colors, and theme elements visible to clients.
- Client Area Version – Displays the currently installed version of the Client Area package.
- Default Client Area Language – Specifies the language displayed by default to all users upon first login.
- Disable Client Area – Allows you to temporarily deactivate client access. When enabled, the client interface becomes unavailable to end users.
Installation
Local installation
If you want the Client Area on the same host as EasyDCIM, the recommended workflow is simply:
sudo easydcim-control app install --key 'LICENSE_KEY'
The local Client Area is installed automatically unless you use --no-client.
External installation
To deploy the Client Area on a separate server, install easydcim-control on that server and run:
sudo easydcim-control client install --mode external --backend-url "https://demo.easydcim.com" --app-token "34|aVsfnLAjLHaMrFP6xlq8OJPacRVsU3gz3HIvCtSb701d64d1"
You can copy the backend URL and application token from Settings → Basic → Client Area in the EasyDCIM backend.
Updating the Client Area
To update an existing Client Area installation, run:
sudo easydcim-control client update
To verify the service after the update:
easydcim-control client status
easydcim-control client logs
SSL Configuration
SSL management commands are available only for an external Client Area deployment. A local Client Area automatically uses the SSL configuration of the main EasyDCIM App.
Free SSL (Let’s Encrypt)
sudo easydcim-control client ssl letsencrypt install client.example.com
sudo easydcim-control client ssl letsencrypt renew
sudo easydcim-control client ssl letsencrypt remove
Paid or custom SSL certificates
sudo easydcim-control client ssl install /etc/ssl/mydomain/fullchain.pem /etc/ssl/mydomain/privkey.pem
After configuring the certificate, update the Client Area URL field in Settings → Basic → Client Area to the final HTTPS URL, for example:
https://client.example.com
noVNC Console Sessions
The Client Area provides built-in support for noVNC console sessions, enabling users to remotely access their devices directly through a web browser. All console traffic is securely proxied through the Client Area to the EasyDCIM backend.
When a session is initiated, the Client Area establishes a tunnel to EasyDCIM via the /websockify/<port> endpoint, ensuring compatibility with EasyDCIM’s native VNC service.
Ports used by Client Area
- Local mode:
8444/TCP,8443/TCP - External mode:
80/TCP,443/TCP - Proxied noVNC sessions:
6081–6200/TCP
Security note for external deployments
If you run the Client Area on a separate external server, you can limit public exposure of the EasyDCIM backend:
- expose only the Client Area publicly,
- keep the EasyDCIM backend behind a private network, VPN, or restricted routing,
- allow only the Client Area host to communicate with the EasyDCIM API and Websockify endpoints.
This is the recommended approach for distributed or higher-security environments.

